
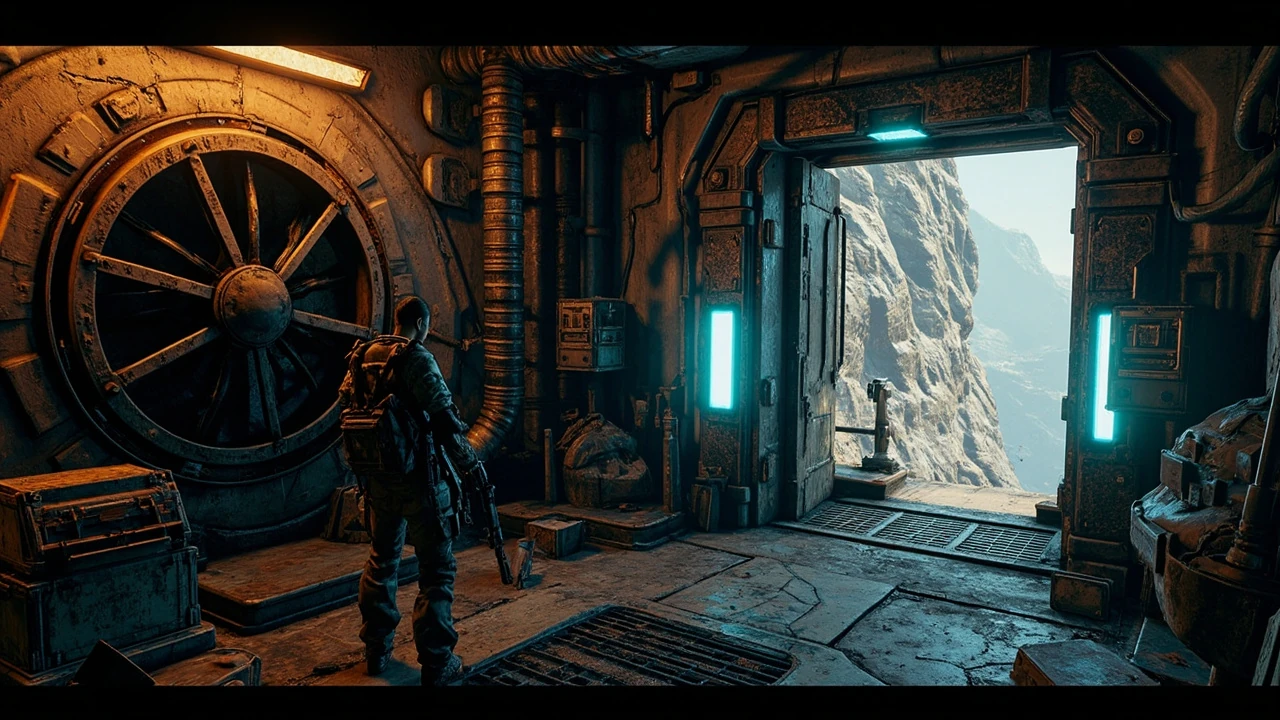
Tipping Point Bunker in Borderlands 4: what the encounter is and how the room is wired
The tipping point bunker is one of the small, self-contained encounter rooms that Borderlands 4 uses to break up its open traversal. It sits in the southeastern corner of the Idolator’s Noose region and behaves more like a sealed puzzle arena than a normal side dungeon: the front door is armored, the only obvious entry is a non-functional ventilation shaft on the left of the main door, and progression depends on a mission-gated container that is not present in the room until the right quest step is active. Players typically reach the location, see the heavy bunker door, and assume the encounter is broken, when in fact the room is waiting on a state change in the quest log.
For a developer or technical player, the interesting part of the tipping point bunker is the way it stitches together three systems that recur across Borderlands 4’s design: soft-locked geometry (a vent that is visually present but only becomes a path because the fan blades are static), gated world state (a physical object that only spawns after a quest flag), and a one-use interaction verb (a throwable container that removes a destructible surface layer from a door). The encounter is short, but the underlying pattern shows up in a number of similar bunkers, vaults, and Order strongholds, so the way it is built is worth more attention than its length suggests.
This guide focuses on the practical side: how to enter the room, how the gated container works, what the throwable does to the door, and which problems players most often hit. It is written for a GameDev reader who wants the design as well as the path, with a side of production notes about how a room like this is wired, validated, and recovered from soft-locks.
Where the tipping point bunker sits in the world
The tipping point bunker is located in the southeastern portion of Idolator’s Noose, the region that contains a high density of Order-controlled facilities in Borderlands 4. The map marker for the bunker is small on the HUD compared to main mission icons, and the entrance is partly recessed into a cliff face, so the room is easy to overshoot when traveling from the central fast travel point. The exterior set dressing includes a sloped approach, a maintenance pad, and a single visible vent stack to the left of the heavy front door.
Three things are worth knowing about the location before you try to enter:
- The bunker shares its visual language with other Order facilities in Idolator’s Noose, so the entrance does not stand out unless you look for the round vent.
- The fast travel station nearest to the bunker is on the southern road; on foot, expect a short run across uneven ground that pulls camera attention away from the vent itself.
- The region around the bunker has line-of-sight sniper positions on the cliffs above, so the approach is rarely quiet, even when you are only scouting the entrance.
If you are mapping the encounter for a guide, a video, or a speedrun route, the room’s position is one of the things that makes it interesting: it is far enough from the region’s main quest path that most players only stumble into it after they have already advanced the campaign. That timing matters for the design discussion later, because it is exactly the gap that produces the most common “I cannot get in” reports.
The Idolator’s Noose region as a whole is one of the more vertically layered parts of Borderlands 4’s open map, with raised plateaus, narrow gorges, and a number of cliff-side bunkers that use terrain to hide their front doors. The tipping point bunker is a clean example of that pattern: the door faces a wall of rock at an angle, the vent is set into a recess that is only visible if you walk past the maintenance pad, and the fast travel point is a few hundred meters away down a slope that points away from the entrance. None of this is accidental, and a guide author who is trying to explain “where is it” to a first-time visitor usually has to start with the geography before the entry sequence.
Two small navigation notes that are easy to miss: the slope below the bunker often has a low wall that the player can mantle for a better angle on the vent, and the sniper positions above the bunker can be cleared quietly with a long-range weapon before the player commits to the climb. Neither trick is required, but both are worth knowing for players who want to enter the room without a fight on the approach.
How to enter the tipping point bunker
The actual entry sequence is short, but each step has a reason it exists in the design. Walking through it as a developer, rather than as a player who just wants the chest, is the difference between remembering a single fix and understanding a reusable pattern.
- Approach the bunker from the left side. The heavy door is to your right; the vent stack is to your left, set into the rock a few meters back from the door.
- Climb onto the low platform in front of the red-marked fan housing. The fan blades are static, which is the visual signal that the geometry is traversable.
- Jump from the platform to the room above the vent. The jump is short but it is meant to feel like a maintenance path, not a hero leap, which is why the target ledge is wide and dimly lit.
- Look for a small machine on the upper room’s back wall. If the machine is not there, the encounter is gated and the rest of the sequence will not work.
- Take the container the machine produces. It is a throwable, single-use, and is the actual key to the bunker door.
- Drop through the open floor grate in the upper room back down to the vent level.
- Run to the front of the bunker and throw the container at the armored door. The container’s effect strips the door’s outer layer and the passage opens.
From a design perspective, the vent entry is doing two things at once. First, it routes the player around the front door and forces them to look at the room from above, which sets up the throwable sequence visually. Second, it is the place where the gated state becomes observable: a player who is on the correct quest step sees the machine and the container; a player who is not simply sees an empty upper room and assumes the encounter is broken. The room does not pop a tutorial prompt to explain that, which is a deliberate choice; Borderlands 4 tends to teach by spatial contrast and by the absence of expected objects.
There is one camera behavior worth being aware of while running the sequence. When the player first climbs the platform in front of the red-marked fan, the camera briefly loses the vent entry because the fan housing clips into the foreground. The jump to the upper room is still valid, but the player has to commit to it without a clear framing of the target ledge. This is consistent with how Borderlands 4 handles most short traversal jumps: the geometry is correct, the camera is just busy. Players who are recording the room for a video often need to orbit the platform once before committing to the jump, which adds a few seconds to the entry but produces a much cleaner shot.
A second behavior worth flagging is the audio cue. When the player is on the correct quest step, the machine on the upper room wall emits a low electrical hum as soon as the player enters the room. The hum is a small signal, but it is the only audio difference between a “live” upper room and a dormant one. Players who learn to listen for it can often diagnose a state-mismatch report without ever opening the quest log.
The gated container and why the room looks empty when it should not
The most common “stuck” report for the tipping point bunker is not a bug, a pathing error, or a render issue. It is a state mismatch. The throwable container only exists in the upper room when the associated mission flag is set, and the bunker door only responds to that specific container. If the player arrives before the mission is active, the upper room contains no machine, no container, and no obvious reason to look further.
Borderlands 4 handles this with the same approach used in other gated encounters: a single quest flag that toggles a small set of actors in the level. The flag controls at least three things in this room:
- The presence of the machine on the upper room’s back wall.
- The spawn of the throwable container that the machine dispenses.
- The destructible layer on the front bunker’s door.
When the flag is not set, the door is not a valid target and the throwable has nothing to interact with. When the flag is set, all three actors appear together and the encounter behaves as a single three-step puzzle. This is why reloading the area, restarting the game, or jumping to a different region and back does not help: the underlying state is still the same. The only way to get the room to work is to advance the mission that owns the flag.
For developers, the takeaway is that a “broken” room is often a room that is working exactly as designed. If you are reading a stuck report and the only symptom is “I cannot enter the tipping point bunker,” the first hypothesis should be a quest state mismatch, not a geometry or scripting bug.
It is also worth being precise about the difference between a flag that is “not set” and a flag that is “set but on the wrong step.” In a few reported cases, the player is on the correct mission but has progressed past the step that toggles the bunker, which produces the same empty upper room and the same locked door. Borderlands 4’s mission log is the only reliable way to distinguish the two, and that is a real usability cost: the log is dense, the step descriptions are short, and the bunker’s gating step is not always labeled with the room’s name. A studio that wants to reduce stuck reports on rooms like this usually has to invest in either clearer step descriptions or a more obvious in-world hint, both of which are design trade-offs against the silent-gating style the room is currently using.
What the throwable actually does to the door
The container the machine dispenses is a one-shot interaction object. It behaves like a small-area acidic grenade with a fixed effect on a specific surface: the outer armored plate on the bunker door. When thrown, it removes that plate and exposes the inner door, which then opens in a single interaction. The container itself is consumed on use and does not return to the player’s inventory.
That single-use design is intentional. It gives the room a clear before-and-after state, which is useful for two reasons. First, it prevents the player from re-entering the bunker through the same trick on subsequent visits, which preserves the “I found a hidden path” feeling on the first run. Second, it gives QA a deterministic state to test: either the plate is present (door locked behind armor) or the plate is gone (door open). There is no in-between state where the plate is half-destroyed and the door is half-open.
The throwable’s behavior also explains a subtle production choice: the player is asked to throw the container at the door from the front of the bunker rather than from the upper room or the vent. The designers want the camera to be on the door, the throw arc to be visible, and the armor-strip moment to be the climax of the entry sequence. A long-distance throw from the vent would have skipped that beat and made the room feel like a key-card door.
There is one edge case worth knowing about the throwable’s behavior. If the player throws the container at the door while standing too far to the left, the throw can clip the door frame and miss the armored plate entirely, in which case the container is consumed without effect and the door stays locked. The fix is small: stand directly in front of the plate, aim at its center, and throw at close range. The container has a generous arc, but its hit volume is narrower than its visual radius, which is a common gotcha for rooms that use single-use consumables on large surfaces.
Production notes: how a room like this is wired
From a production standpoint, the tipping point bunker is a small but informative example of how Borderlands 4 builds its gated encounter content. The room is a self-contained sublevel with three layers of state, all driven by one quest flag.
| Layer | Component | Behavior when quest flag is unset | Behavior when quest flag is set |
|---|---|---|---|
| Geometry | Vent shaft, upper room, floor grate | Traversable; visual layout is identical | Traversable; visual layout is identical |
| World state | Machine on the upper room wall | Hidden or removed | Spawned, idle animation only |
| World state | Throwable container | Not present in the world | Dispensed by the machine on interaction |
| Surface | Armored plate on the bunker door | Present, immune to normal damage | Present, vulnerable to the container’s effect |
| Door | Inner door interaction | Inactive | Opens after the plate is removed |
This kind of layered state is what makes the room feel “designed” rather than “scripted.” A scripted room would simply teleport the player from the vent to the interior on a single trigger. A designed room keeps every step observable: the player sees the empty upper room, the player sees the machine appear after the flag flips, the player picks up the container, the player sees the door react. The encounter is essentially a short tutorial for the gated-bunker pattern, even though it never labels itself as one.
For a studio building similar rooms, the production checklist is short but worth being explicit about:
- One quest flag should own the entire room’s state; avoid spreading the room across multiple quest steps that can drift out of sync.
- Each gated actor should have a visible idle state so the player can tell when the room is “live” and when it is dormant.
- The one-use interaction should consume the throwable and update the door’s surface in a single atomic step, not a multi-frame animation that can be interrupted.
- The fail state of the room should be a silent no-op, not an error pop-up, so the player is pushed back to the quest log rather than to a bug menu.
None of this is exotic, but the tipping point bunker is a clean illustration of the pattern because it does not have any other systems attached: no NPC dialogue, no mid-fight phase change, no escort. The room is just geometry, state, and one consumable.
For studios thinking about how to validate a room like this, the QA matrix is also short. The two states that matter are “flag unset” and “flag set,” and within each state there are at most two or three interactions to test: the platform jump, the machine interaction, the throwable, and the door. A complete test pass for the room can be done in under five minutes once the test build is in a known quest state, which is one of the reasons the pattern is so popular in Borderlands 4: the encounter is small enough to be cheap to validate, but structured enough to teach the player something.
One production detail that is easy to miss: the room’s audio is also gated by the same flag. The machine’s hum, the vent’s ambient drone, and the door’s open sound are all part of the same state bundle. This is what gives the room its “live” feeling, and it is also what makes the dormant state feel wrong to a player who has played the encounter before. Sound design in a small room like this is doing a lot of the work that UI would otherwise have to do, and it is one of the reasons the encounter reads as a designed moment even though there is no on-screen tutorial.
Common stuck points and how to diagnose them
Because the tipping point bunker is gated by a single quest flag, most stuck reports fall into a small number of buckets. Sorting them by likelihood is the fastest way to recover the player’s progress without burning time on the wrong fix.
| Symptom | Likely cause | First check |
|---|---|---|
| Upper room is empty, no machine, no container | Quest flag for the encounter is not set | Open the mission log and confirm the gating mission is active and at the correct step |
| Machine is present but gives no container | Interaction cooldown or transient replication delay | Wait a few seconds, re-interact, then leave and re-enter the upper room |
| Container is in the inventory but door does not react | Throwable used on the wrong surface or thrown off-angle | Stand directly in front of the armored plate, aim at the plate, throw at close range |
| Door opens but the interior is empty or non-functional | Room is active but the post-entry script has not fired | Reload the nearest fast travel and return to the bunker; the room usually re-initializes |
| Player is inside the bunker but cannot exit back through the door | One-way door, by design | Use the internal teleporter or fast travel; the front door is intended as an entry-only path |
Of these, the first is by far the most common, and the fix is almost always on the quest log, not on the room itself. The fourth and fifth rows are worth noting for QA leads, because they look like bugs at first glance but are actually correct behavior. A one-way entry door with a teleporter exit is a common pattern in Borderlands 4, and it is easy to mistake the lack of a return path for a missing interaction.
For developers reviewing stuck reports in a live game, the practical rule is to validate the quest flag before validating anything else. If the flag is correct and the room is still unresponsive, then it is worth looking at the room’s local script; if the flag is off, no amount of reloading will help.
It is also worth flagging one bucket that the table does not cover: the “I am in co-op and the room is empty for me but not for my partner” case. The tipping point bunker is a shared instance, but the upper room’s machine and container are usually bound to the host’s quest state, which can produce a desync where one player sees a live room and the other sees a dormant one. The fix in that case is to wait for the host to reach the correct step, after which the room will populate for both clients. This is not a bug in the encounter; it is a general property of Borderlands 4’s co-op quest gating, and it shows up in a number of similar gated rooms in Idolator’s Noose.
Design lessons a small bunker can teach
Short encounters tend to be the most informative design references, because they have no room for wasted systems. The tipping point bunker uses three ideas that show up across a lot of good level design, and they are worth taking out of the Borderlands 4 context.
The first idea is that a locked door can be a story beat, not just a barrier. The bunker’s front door is a literal locked door, but the design around it turns the lock into the entire point of the room. The player is not “denied entry”; the player is being told that entry is a separate task, and the rest of the room is the task. That is a very different feeling from a door that simply says “wrong key” and refuses to open.
The second idea is that gating can be silent. The tipping point bunker does not pop a message, light up a waypoint, or change the door’s tooltip when the quest flag is not set. The room just looks under-furnished. That silence is a design choice: the game trusts the player to connect “empty upper room” with “I am not supposed to be here yet.” It is a trust that some players will appreciate and some will resent, and the room’s high stuck-report rate is essentially the cost of that choice.
The third idea is that a one-use interaction is a memory aid. The throwable container is consumed on use, which means the player cannot repeat the trick. That single-use constraint is what makes the room feel like a discovery rather than a mechanic. If the container were reusable, the door would become a routine and the room would lose its punchline.
For studios, the practical translation is that small, well-gated encounters are useful both in-game and as teaching artifacts. They show how to combine a soft-locked path, a single flag, and a consumable interaction into a three-minute experience that still feels designed.
There is a fourth, less obvious lesson that the room also teaches. The encounter’s pacing is built around the absence of combat for the first half of the sequence: the player climbs, jumps, listens, and reads the room before anything fights back. That calm opening is what makes the throwable’s payoff feel earned. A room that opened with a fight and then asked the player to solve a quiet puzzle would land very differently, because the player’s first instinct would be to keep shooting. The tipping point bunker resists that instinct on purpose, and the design lesson is that even a two-minute encounter can benefit from a deliberate change in tempo.
Speedrun and routing context
For a speedrun or a guide route, the tipping point bunker is a low-priority side room: it has a short entry, a small loot payoff, and no time-sensitive mid-fight phase. The room is worth visiting on a completionist or 100% run, but it is rarely on a main mission route.
Two routing notes are worth recording:
- The room is fastest to enter from the south, using the cliff path that approaches the vent stack from below. Approaching from the door side forces a longer redirect through the maintenance pad.
- Because the container is a one-use throwable, any route that wants the bunker’s loot has to be planned for a single visit. There is no setup you can do on a previous run that will speed up a later run, because the door’s armored plate resets with the encounter.
For developers thinking about route design, the room is a useful data point: even a small encounter can shift a route’s total time by 30 to 60 seconds, and the entry animation alone takes longer than the average loot pickup. The room’s existence is more about teaching the pattern than about adding depth to the region’s loot economy.
One routing quirk that is worth recording for video guides: the room’s map marker only updates to “completed” after the chest inside is opened, not after the door is opened. A speedrun that opens the door and then skips the chest will leave the marker on the map, which can confuse a viewer who is trying to follow the route by markers alone. The cleanest way to record a route through the room is to open the door, walk in, open the chest, and leave through the teleporter, in that order.
How the tipping point bunker compares to similar rooms in Borderlands 4
The tipping point bunker is not unique within Borderlands 4; it shares its structure with several other small encounter rooms in the same region. The differences between them are mostly cosmetic, but the contrast is useful for understanding what the tipping point bunker is actually doing.
| Room type | Entry method | Gating mechanism | Loot payoff |
|---|---|---|---|
| Tipping Point Bunker | Non-functional vent, then a gated container throwable | Single quest flag, controls the upper room’s machine | Small chest, cosmetic, one-time |
| Standard Order facility | Front door with a keycard-style interaction | Item-based gating, no quest flag | Modest chest, repeatable in some cases |
| Vault-style arena | Single trigger, teleport into the room | Multi-step quest flag, often with a mid-fight phase | High-tier loot, one-time per character |
| Cave side room | Free traversal, no door | None | Chests, sometimes hidden, often repeatable |
The tipping point bunker is on the “smaller, softer” end of that spectrum. It is closer in feel to a side room than to a vault arena, and that placement is part of why it reads as a teaching artifact: it is small enough to finish in a few minutes, but structured enough to demonstrate the gated-container pattern that the larger Order facilities reuse later in the region.
For a developer, the practical takeaway is that this kind of room scales well. The same pattern, with a longer throwable animation, a heavier door, and a more elaborate interior, is the spine of many of the larger Order strongholds. The tipping point bunker is essentially the prototype, and it is one of the reasons a careful playthrough of Idolator’s Noose on a first character can be informative for a level designer before they ever touch the larger arenas.
One comparison worth being explicit about: the tipping point bunker is not a vault, and it does not use the same loot rules. Vaults in Borderlands 4 are gated by a separate set of flags and are tuned around a combat encounter, not a traversal puzzle. Players who try to use the tipping point bunker as a vault reference will be looking at the wrong set of systems, and the room will read as a stripped-down vault rather than as its own thing. It is closer in spirit to a maintenance room than to a vault, and that placement is part of why its encounter design is so compact.
What the room’s loot actually contains
The chest inside the tipping point bunker is small by Borderlands 4 standards. In practice it tends to contain a mix of cosmetic items, a small amount of cash, and occasionally a low-rarity weapon that is more useful as a vendor fodder than as a build piece. None of that is the point of the room, and the loot is calibrated to match the encounter’s role as a teaching artifact rather than as a farming location.
For players who are running the room for the first time, the value of the chest is mostly in the discovery moment: opening a hidden door, solving a small puzzle, and finding a payoff that confirms the room is real. The value drops sharply on the second visit, which is one of the reasons the encounter does not support repeat runs in any meaningful way.
For developers, the loot table is also a small lesson. A short, gated room does not need a high-rarity reward to feel like a reward; it needs a clear before-and-after. The tipping point bunker gets a lot of its satisfaction from the entry sequence, and the chest is just the confirmation that the sequence was worth running. That is a useful calibration point for studios that are tempted to gate short rooms behind high-rarity loot, which usually produces frustration rather than satisfaction when the room is empty or skipped.
One more detail that is worth recording for completionist runs: the chest inside the bunker counts as a single discovery event for the Idolator’s Noose challenge tracker, and the entry sequence counts as a second event. Together, the room adds two ticks to the region’s completion percentage, which is a small but real contribution for players who are working toward 100% in the region.
How the room behaves on repeat visits
Once the tipping point bunker has been opened, its behavior changes in a way that is easy to miss on a casual playthrough. The armored plate on the front door does not reset, the machine on the upper room wall stays in its idle state, and the throwable container is no longer dispensed. The front door behaves like a normal open door, and the room can be entered directly from the front without climbing the vent or interacting with the machine.
This is a common Borderlands 4 pattern for short gated rooms, and it is worth being explicit about because it affects how the room is documented. A guide that describes the entry sequence as if it were always live will confuse players who return to the room and find the door already open. The accurate description is that the sequence is live once, on the first visit during the gating mission, and is bypassed on every subsequent visit.
For developers, the repeat-visit behavior is also a small production choice. Resetting the room on every visit would be technically simple but would also reintroduce the same stuck-report risk for players who reload into the area or revisit it from a different quest state. Leaving the room “open” after the first completion is a more conservative choice, and it is the one Borderlands 4 makes for the tipping point bunker.
There is one edge case that is worth knowing about: if the player loads a save from before the gating mission was completed, the room resets to its dormant state and the entry sequence runs again. The room is bound to the save, not to the player’s global progress, which is the standard behavior for Borderlands 4’s gated encounters. Players who want to re-run the entry sequence for a video or a guide can do so by loading an earlier save, which is a useful trick for content creators who are documenting the room in detail.
Frequently asked questions
Why is the tipping point bunker door not opening when I throw the container?
The container only interacts with the armored plate on the front door when the gating quest flag is set. If you are on the wrong step of the mission, the door will not respond to the throwable, and the plate will not visually react either. Confirm the correct mission step in your log before re-trying the throw, and stand directly in front of the plate to avoid the throw clipping the door frame.
Do I need a specific mission to enter the tipping point bunker?
You need the mission that owns the bunker’s quest flag to be active and at the step that unlocks the room. Without that, the upper room’s machine does not spawn and the throwable does not exist, so the entry sequence cannot complete. The room is not a free-roam side area; it is gated to a specific step in the campaign.
Can I enter the tipping point bunker without climbing the vent?
There is no alternate entry in the live game on a first visit. The vent is the only designed path. The front door is locked behind the armored plate and the only way to remove the plate is with the throwable from the upper room. On repeat visits, after the room has been opened, the front door can be used directly.
Is the tipping point bunker repeatable?
The encounter can be revisited, but the throwable is consumed on first use and the armored plate does not reset. In practice this means the room has a one-time entry sequence and a one-time loot pull; after that, the front door behaves like a normal open door with no further interactions, and the chest inside does not refill.
Where exactly is the tipping point bunker on the map?
It is in the southeastern part of Idolator’s Noose, set into a cliff face with a small maintenance pad in front. The nearest fast travel station is on the southern road, and the bunker’s vent stack is the round fixture to the left of the heavy front door. The cliff approach from the south is the cleanest way to reach the vent without fighting through the sniper positions on the ridge above.
What is inside the tipping point bunker?
Inside is a small loot room with a chest and a small amount of environmental storytelling. The interior is not a multi-phase arena; it is a one-room payoff designed to feel like the reward for solving the entry puzzle. The chest tends to contain cosmetics, a small amount of cash, and occasionally a low-rarity weapon.
Is the tipping point bunker entrance the same on every character?
The entry sequence is identical across characters because it is driven by the same quest flag. There are no class- or build-specific shortcuts, and there is no dialogue that changes the room’s behavior based on the player’s Vault Hunter. The only difference between characters is the time at which each player reaches the gating mission, which controls when the room becomes live.
What should I do if the upper room’s machine never appears?
Confirm the gating mission is at the correct step, then fast travel away and back to the bunker. If the machine is still missing, the flag is almost certainly not set; there is no in-world fix for that, and the only path forward is to advance the mission. In co-op, wait for the host to reach the gating step, since the upper room’s machine is bound to the host’s quest state.
Does the tipping point bunker count toward region completion?
The room is tied to the Idolator’s Noose discovery and challenge set, so entering it and opening the chest will update the relevant progress trackers. The exact category depends on your current patch, but the chest and the entry together usually count as one discovery event for the chest and a second event for the entry sequence, adding two ticks to the region’s completion percentage.
Is the tipping point bunker encounter a good reference for my own level design?
Yes, particularly if you are designing a short, gated side room. The tipping point bunker is a clean example of how a single quest flag, a soft-locked path, and a one-use throwable can be combined into a small, self-contained encounter that still feels like a designed moment rather than a script. It is also a useful reference for how to handle the silent-gating style, and for the production cost of that style in terms of stuck reports.
