
Apostate key Silksong: where to find it and what it unlocks
The apostate key in Silksong is the item Hornet needs to open two locked rooms inside the Slab, the bug prison that becomes a mandatory mid-to-late area of the campaign. It is the kind of object that frustrates players on a first playthrough because the key itself is hidden roughly a zone away from the locks it operates, so the natural reaction on encountering a sealed door in the Slab is to assume the prison itself will hand the answer to you. It does not. The apostate key sits in the Putrified Ducts, a connected transit region that most players pass through while heading elsewhere, and the two locks it opens are the Slab Bellway shortcut and a top-of-corridor chamber containing a mask shard.
Because the key, the prerequisites, and the route are all narrow, this guide keeps to a single intent: helping a Hollow Knight: Silksong player pick up the apostate key with the right abilities, return to the Slab, and use it on both doors. Section coverage includes the prerequisites, the path from the Memorium into the Putrified Ducts, the exact location of the key, the two Slab locks, and the post-unlock decisions that determine whether the key was worth the detour.
What the apostate key actually is in Silksong
Functionally, the apostate key is a single-use permission token. It exists only to open two specific doors inside the Slab, and it has no secondary use outside that prison. It is not consumed when you open a door, but it is also not a currency, tool, or weapon, so there is no reason to keep it once both locks have been opened.
For GameDev readers thinking about how this kind of gating is structured, the apostate key is a classic off-site collectible key. The design choice is simple: the player reaches the Slab, encounters a sealed door that is clearly meant to open later, leaves the Slab to explore other regions, eventually finds the key in an unrelated area, and returns to claim the reward. The system rewards players who backtrack through already-cleared space and punishes players who try to speedrun the campaign in a single direction.
Prerequisites before you can pick up the apostate key
The path to the apostate key is gated by two traversal abilities rather than by story progression. According to the walkthrough on IGN’s Hollow Knight: Silksong wiki, the player needs both Clawline and Double Jump before the Putrified Ducts route becomes reachable. Without those, the ceiling opening in the Memorium and the wall-break shortcuts later in the corridor are simply not traversable.
The practical ordering looks like this:
- Acquire Double Jump from its ability shrine. Most players grab this during the early mid-game progression through Greymoor or the surrounding ridges.
- Acquire Clawline, the silk-grapple traversal ability, from its own ability shrine. Clawline changes how the player crosses vertical rooms and is the same ability that unlocks a long list of optional paths.
- Reach the Slab at least once to learn that the locked doors exist, so you have a clear reason to detour into the Putrified Ducts.
- Open the Memorium bench, since the documented path begins from that resting point.
Players who try to grab the apostate key before Clawline is unlocked will reach the Memorium, see the tattered-rag dead-end room, and find no obvious way to continue upward. That ceiling opening is a soft gate: the level geometry telegraphs the path, but the abilities decide whether the geometry is friendly or hostile.
Route to the apostate key: Memorium into the Putrified Ducts
The IGN walkthrough describes a specific path. The route below follows that path and is written to be followed in a normal playthrough where the player has already explored the Putrified Ducts from the other side. If you have not yet mapped the Ducts at all, expect to add a few minutes of map-filling before the key becomes findable.
- Start at the Memorium bench on the southwest side of the chamber.
- Go east until you reach a dead-end room with tattered rags hanging from the ceiling.
- Use Double Jump to reach the hidden opening above and pass through into a horizontal passage.
- Go right, strike the switch to open the door, and continue right across the balcony and bridge.
- At the rock wall, climb up, then break through the hidden tunnel to continue right.
- Enter the next room, go up, go right, drop down, and continue right to reach the Putrified Ducts.
- Inside the Ducts, stay on the upper platform level and move right until you reach an open entryway.
- Drop to the bottom floor, break through the wall on the left, and then break through the wall on the left again in the next room.
- Use the middle platform to reach the left ledge, run through the short tunnel, and let the ceiling vine grab Hornet on the other side.
- Let the vine carry you up, break free left through the opening it exposes, and continue left into a small dead-end room.
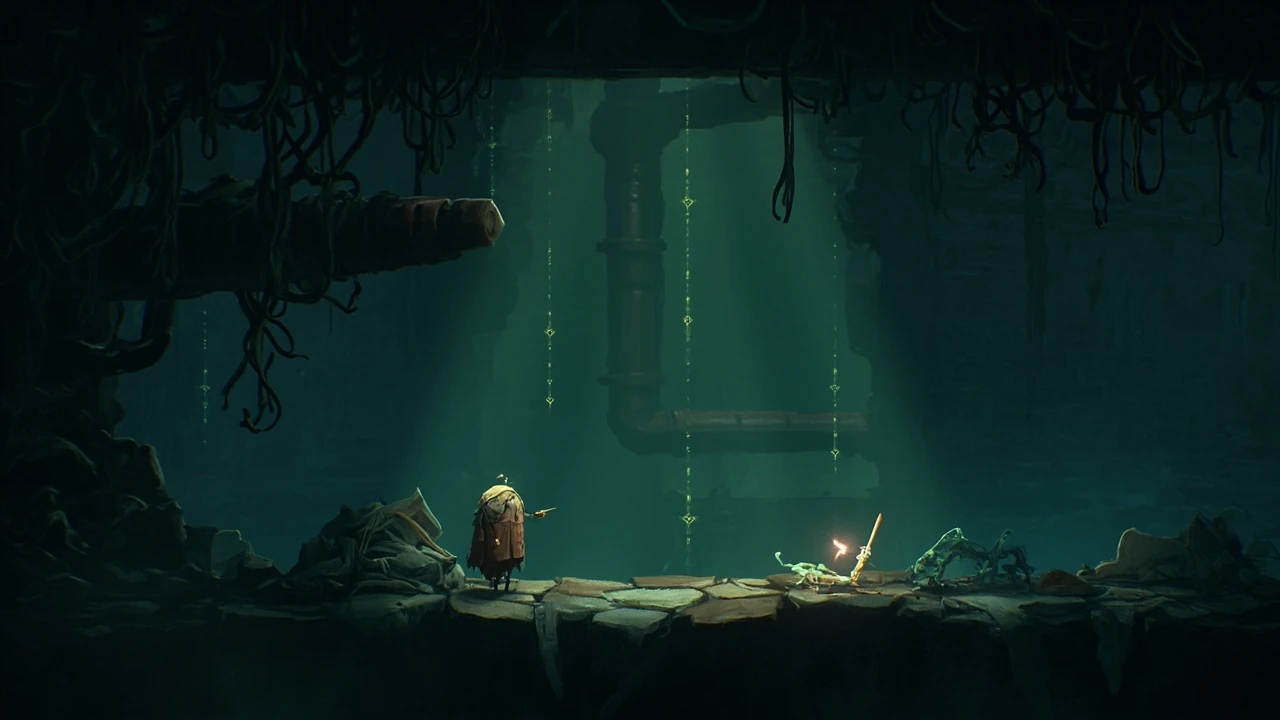
- Attack the small glowing item among the pile of junk to free the apostate key.
The vine-grab step is the most commonly missed interaction for first-time visitors. The room is set up so the vine pulls the player upward in a direction that does not obviously lead anywhere, and the left-hand opening only becomes visible as the player approaches the apex of the pull. The intended response is to let the vine do the work and then disengage toward the visible opening, which is what the walkthrough describes.
Where the apostate key actually spawns in the Putrified Ducts
The key sits in a small dead-end alcove that branches off from the vine section of the upper Ducts. The visual cue is a small glowing item partially buried in junk, which the player attacks to dislodge. There is no puzzle attached to the pickup itself: the room contains no additional enemies, no switches, and no dialogue trigger. The only mechanical input is the attack that frees the key from the pile.
The Ducts are not a combat-heavy region, which is one of the reasons the key is placed here. The challenge is traversal, not enemy density, so the pickup acts as a reward for sticking with a maze-like area instead of skipping it on the way to a more obviously important zone.
What the apostate key unlocks in the Slab
For additional context, Once you have the apostate key, return to the Slab. The walkthrough on IGN’s wiki describes two doors. The first is the one most players will open because it is on the critical path for finishing the prison. The second is a side reward that adds a mask shard to the run.
| Lock | Location in the Slab | What it unlocks | Path to reach it |
|---|---|---|---|
| First apostate key lock | Right-hand wall of the upper area reached by going up from the Slab Bellway | Shortcuts to the Slab’s vertical corridor and to the Choral Chambers | From the Slab Bellway, go right, platform up into the next area, then go right and up to reach the lock |
| Second apostate key lock | Top of the Slab’s vertical corridor, right-hand side | A room containing a mask shard, reachable by pogo-jumping to the ceiling of that room | From the first lock, go left to the end of the corridor, climb up and out, then go right and wall-jump up the vertical shaft to the top lock |
The first lock is functionally a quality-of-life unlock. The shortcuts it opens let the player move through the Slab faster and provide a faster route into the Choral Chambers, which is useful both during the first visit and during any post-story cleanup. The second lock is a pure reward, since the mask shard inside is the only thing behind that door.
Why the apostate key exists as a backtracking item
From a game-design perspective, the apostate key is one of several keys in Silksong that follow the same pattern: the lock and the key are placed in different regions, and the player has to connect the two by exploration. The design choice keeps the prison from feeling like a one-shot zone, gives the Putrified Ducts a reason to exist as a destination rather than a corridor, and forces a return trip through already-cleared space. Returning through cleared space is the moment when the player’s new traversal abilities make old geometry feel different, which is one of the metroidvania genre’s core satisfactions.
For developers studying the design, three patterns are worth noting:
- Off-site keys reset the player’s mental map. The Slab is no longer a closed box; it is a node connected to the wider world by an object the player now owns.
- Both apostate key locks are placed so the first one improves traversal and the second one improves survivability through a mask shard. The player gets a movement reward and a stat reward from the same item.
- The visual cue for the key is deliberately subtle. A glowing item in a pile of junk rewards close attention to level dressing rather than a glowing quest marker, which matches the wider visual language of Hollow Knight: Silksong.
Common problems and how to spot them
Even with the walkthrough in front of you, the apostate key is one of the easier pickups to misread. The table below covers the failure modes that show up most often in community reports and the diagnostic signal that points to each one.
| Symptom | Likely cause | Diagnostic signal | Fix |
|---|---|---|---|
| Ceiling in the tattered-rags room looks unreachable | Double Jump is not yet unlocked | Backtrack, unlock Double Jump, and return | |
| Wall after the bridge refuses to break | Clawline is not yet unlocked, so the upper section of the wall is unreachable | You can break the lower wall section but not the one above it | Acquire Clawline, then return to the Memorium |
| Vine grabs Hornet but there is no opening to the left | Player is too high or too low when the vine releases | Vine releases above the left passage or below the visible platform | Wait for the opening to align on the left before breaking free |
| First lock in the Slab will not open | Player assumed the Slab has its own in-zone key | No Apostate Key icon in inventory, no prompt when the lock is struck | Detour into the Putrified Ducts, pick up the apostate key, then return |
| Second lock opens but the room is empty | Mask shard is on the ceiling, not on the floor | Visual scan of the room shows only walls and a high platform | Pogo-jump up the room’s central columns to reach the shard on the ceiling |
One failure mode worth calling out separately: a player who enters the Slab for the first time and sees a sealed door will sometimes assume the key is on the same map, which is the opposite of how the design is set up. The visual cue that you are dealing with an off-site key is that the lock is themed for a different region. The Slab locks read as prison architecture, while the apostate key reads as a salvaged item, which is a small but useful consistency check.
Should you detour for the apostate key early?
Yes, but only after Clawline is unlocked. The detour is worth it for two reasons. First, the first lock opens shortcuts that make the rest of the Slab faster, which compounds over the remainder of the run. Second, the second lock’s mask shard is one of the easier mask shards to grab once the player knows the layout, because the room is small and the pogo route is linear.
The case for delaying the detour is mainly about optional content volume. If a player is on a minimal-progression route, the apostate key is one of several off-site keys, and the second lock’s mask shard is a small survivability gain rather than a build-defining reward. The honest framing is that the apostate key is high-value if the player is already heading through the Putrified Ducts, and low-priority if the player is trying to rush the main path.
How the apostate key compares to other Slab-adjacent keys
Silksong uses several off-site keys, and the apostate key is one of two that the Slab specifically reads. The table below compares it to the other common keys you may encounter on a similar route, with the caveat that the wiki entries for some of these items list only the location of the key rather than the lock.
| Key | Region the key is found in | Region the lock is found in | Reward behind the lock | Prerequisite traversal abilities |
|---|---|---|---|---|
| Apostate key | Putrified Ducts | The Slab (two locks) | Slab shortcut to the Choral Chambers, mask shard | Clawline, Double Jump |
| Simple Key | Various side rooms | Locks scattered across multiple regions | Region-dependent shortcut or chest | None beyond reaching the source |
| Other Slab-related keys | Adjacent transit regions | The Slab or its connected chambers | Region-dependent | Region-dependent |
Two of the entries above are described at a high level because the verified IGN excerpt only covers the apostate key in detail. The comparison is still useful because it shows the design pattern: Silksong tends to place keys in transit regions like the Ducts and the locks at the ends of the routes the player was going to take anyway, which keeps the key system from feeling like a chores list.
What to do after the apostate key is used
Once both locks are open, the apostate key has no further use. A few practical follow-ups are worth planning before you leave the Slab:
- Use the Slab Bellway shortcut to chain into the Choral Chambers without backtracking through the lower prison.
- Map the second lock’s room before leaving. The pogo route to the mask shard is short, but missing it means the room reads as a dead end and you may not return.
- If you have other Slab locks open, chain them. The prison becomes dramatically faster to traverse once two or three of the off-site keys are in hand.
- Check the Putrified Ducts map coverage. The Ducts have several branches that are easy to skip on a key-hunt run, and a clean map is the difference between a future smooth backtrack and a future slow one.
Players who clear the Slab in a single sweep after picking up the key will find the second half of the prison noticeably easier than the first, because the new shortcuts remove the worst of the vertical retracing.
Quick reference: the apostate key in one screen
The summary below is the minimal version of the route. Use it as a checklist rather than as a substitute for the full walkthrough above.
- Region where the key is found: Putrified Ducts.
- Path in: Memorium bench, tattered-rags room, hidden ceiling, switch, balcony, bridge, rock wall, hidden tunnel, upper Ducts.
- Pickup: glowing item in a small dead-end alcove, freed by attacking it.
- Region where the locks are found: the Slab.
- Lock 1: Slab Bellway shortcut to the vertical corridor and the Choral Chambers.
- Lock 2: top of the vertical corridor, mask shard on the ceiling.
- Prerequisites: Clawline and Double Jump, plus the Memorium bench unlocked.
Frequently asked questions
Where is the apostate key in Hollow Knight: Silksong?
The apostate key is in the Putrified Ducts, in a small dead-end alcove off the upper Ducts’ vine section. It looks like a small glowing item partially buried in a pile of junk, and you free it by attacking the item a few times.
What does the apostate key unlock?
It unlocks two doors inside the Slab. The first is reached from the Slab Bellway and opens shortcuts to the Slab’s vertical corridor and to the Choral Chambers. The second is at the top of that vertical corridor and contains a mask shard reached by pogo-jumping to the ceiling of the room.
Do I need Clawline and Double Jump to get the apostate key?
Yes. The path from the Memorium bench uses Double Jump to reach the hidden ceiling opening, and Clawline to handle the wall-break shortcut that follows. Without both abilities, the documented route is not traversable.
Can I get the apostate key before reaching the Slab?
You can pick up the key any time after Clawline and Double Jump are unlocked, but the locks only matter once you have a reason to be in the Slab. Most players grab the key on a natural backtrack through the Putrified Ducts while heading toward the prison.
Why is the apostate key placed in the Putrified Ducts and not in the Slab?
Placing the key in a different region forces the player to leave the prison, explore connected transit areas, and return. The pattern rewards backtracking and keeps the Slab from feeling like a one-shot zone.
Is the mask shard behind the second apostate key lock worth the detour?
It is worth the detour if you are already in the Slab, because the room is short and the pogo route to the shard is linear. It is a low-priority detour on a minimal-progression run, since the mask shard is a survivability gain rather than a build-defining reward.
What is the easiest path to the apostate key from the Memorium?
From the southwest bench, head east into the tattered-rags dead end, double jump into the hidden ceiling opening, hit the switch on the right, cross the balcony and bridge, climb and break through the rock wall, then move up, right, drop down, and right again to enter the Putrified Ducts. Stay on the upper level, drop to the bottom, break through two left-hand walls, and use the ceiling vine to reach the key alcove on the left.
What should I do if the vine section in the Putrified Ducts will not let me reach the key?
Wait until the opening on the left is visible before breaking free. If the vine releases you above or below that opening, the geometry will not line up, and the alcove will read as unreachable. The opening is only visible near the apex of the vine’s pull.
Does the apostate key get consumed when I open a door?
No. The key is not consumed, but it has no other use once both Slab locks are open, so there is no reason to keep it after the second lock is cleared.
Is there any other use for the apostate key outside the Slab?
No. The apostate key is tied to the two Slab locks and is not used in any other region. Once both locks are open, the item exists in the inventory as a finished quest item with no follow-up.
