
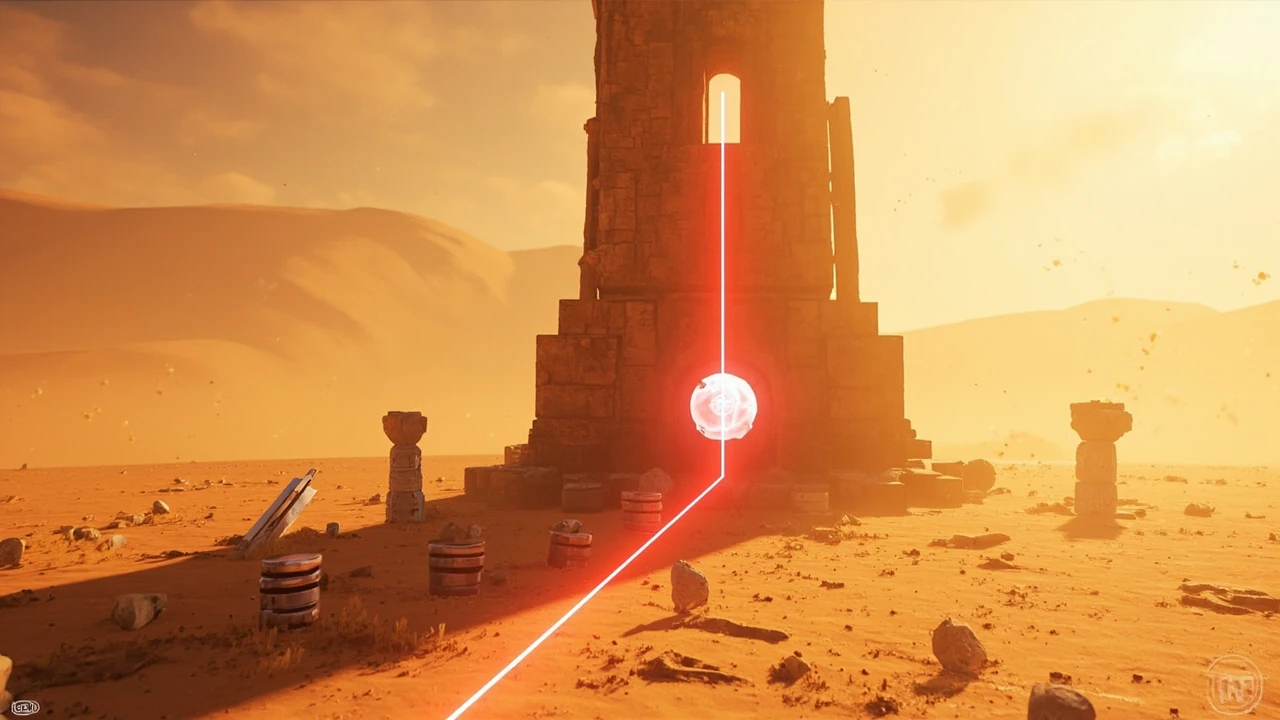
Spire of the sun Crimson Desert: how the puzzle actually works
The Spire of the Sun is one of several optional spire puzzles that unlock new routes, abilities, and reward caches across the Crimson Desert region in Pearl Abyss’s open-world action RPG. It sits in the Forebearer’s Barrens subregion and ties into the Chapter 9 Sage of Desert questline through the Thinning Blade – Crossing Point mission. The puzzle is a two-part challenge: a ground-level mirror redirect built around an Abyss Nexus, and an interior climb where you bounce a beam up a series of stair-step mirrors to the top. Both halves gate the Abyss Gate at the summit, which is the actual completion event.
This guide focuses on the practical side of clearing the spire. It walks through the prerequisites, the ground mirror arrangement, the reset rules when the puzzle misbehaves, and the interior laser climb, so a player can solve it without guessing. The structure of the puzzle is also useful to think about as a designer, because it is a clean example of an open-world “be redirector” gate in which a fixed environment is reused as a multi-stage obstacle.
Prerequisites before you reach the spire
The Spire of the Sun is not available from the moment you enter Crimson Desert. It sits behind a story and exploration gate, which matters because both halves of the puzzle assume you can survive the surrounding hostiles and have a mount or stamina reserves to travel into the Barrens.
- Progress the Sage of Desert questline in Chapter 9 until Thinning Blade – Crossing Point becomes available. The spire is attached to the later steps of that chain, not the opening beats.
- Travel to the Forebearer’s Barrens in the Crimson Desert region. The spire’s exterior map marker is only meaningful once the questline has routed you there.
- Prepare for combat. The upper-level area around the Abyss Nexus is patrolled, and activating the nexus can pull additional threats before the puzzle is solvable.
- Bring a mount or plan for a stamina-heavy approach. The spire is on a plateau, and the exterior puzzle area is wide enough that you will be walking back and forth between mirror groups while testing laser lines.
- Save before starting the mirror section. Manual saves give you a much faster reset than the passive reset rule described later, which is the single biggest time saver when you misalign a beam.
None of these prerequisites are optional. Players who reach the spire marker early, before the Crossing Point step, find the area accessible but the quest conditions absent, and the Abyss Nexus interaction is gated by the same story state that puts the marker on the map in a useful way.
Locating and activating the Abyss Nexus
Once the questline has routed you to the Forebearer’s Barrens, the spire is visible from a distance as a tall, weathered stone column on the plateau. The puzzle does not begin inside the spire. It begins on the upper level outside, at the Abyss Nexus on the northeast side of the spire, adjacent to two sets of ruins.
The Abyss Nexus is the interaction point that arms the ground mirror array. Without it active, the mirrors can still be pushed around, but no lasers are emitted and the gem target at the end of the chain has no effect on the spire door. The order is therefore fixed: activate the nexus first, then read the puzzle from the outside in.
From the activation point, the next thing to look for is the ground mirror array, which sits east of the spire on the upper level. The array is a mix of movable mirrors, one or more immovable decorative mirrors, and a set of distant building targets that the final beam needs to reach. The clearest visual cue that you have found the right area is a single dark mirror among the others. That mirror is the linchpin of the entire redirect chain, and every ground-level step moves, references, or reacts to it.
How the ground mirror puzzle is structured
The ground puzzle is best understood as a chain of laser redirections, not as a free-form arrangement. Each step exists because the previous one is in a state the chain needs to undo or extend. Once you see the chain, the solution stops looking like guesswork.
The high-level flow is:
- Move a mirror out of the way of the gem on the west side, so the gem is no longer blocked from receiving a future beam.
- Reposition a clustered mirror group so the original beam can travel through the cluster instead of bouncing uselessly outward.
- Place a mirror in a beam that currently points to empty desert, turning it into a useful branch toward the next stage.
- Position the dark mirror at the intersection point of the four octagon pattern on the ground, aligning the chain with the gem target.
- Align the final mirror with a distant building, completing the chain so the gem fires into the spire.
Once the gem has a laser pointing into it, the spire door responds. If it does not, the chain is misaligned at the final mirror, and the step that needs adjustment is always the last one you moved.
Step-by-step: the ground mirror solution
These are the verified steps for the ground mirror array at the Spire of the Sun. The reference orientation is “facing” the direction noted in each step, with the spire behind you unless stated otherwise.
- Move the mirror directly in front of the gem to the west, pushing it until it stops. The goal here is simply to clear the gem’s line of sight; the mirror ends up pushed against a wall or boundary, not aimed at anything.
- Go to the cluster of three mirrors near the laser that currently points outside the ruins to nothing. Stand behind the third mirror from the right while facing southwest, and push it toward the laser until it is touching the laser and the mirror in front of it. This compresses the cluster so the beam can pass through it cleanly.
- After the cluster is corrected, a new laser will point eastward out of the ruins to nothing. Push the dark mirror to the right of that new laser, while facing east, into the laser. This re-aims the branch from “useless” to “useful”.
- Face south toward the laser that still points outside the ruins. Push the dark mirror to the west until it reaches the intersection of the floor lines, then push it north until it sits in the very center of the four octagon pattern beneath it. The correct mirror is identifiable because it is the only one in the immediate area that can still be pushed.
- Still facing south, locate the laser that points toward the second of three distant buildings. Grab the dark mirror in the northwest corner relative to you, push it south as far as it can go, and then push it west into the laser pointing toward those buildings.
- Verify the chain: the gem should now have a laser pointing into it, and that gem should be firing a laser into the spire, opening the entrance. If the gem is dark, the only mirror that needs adjustment is the one moved in step five, usually a small vertical or horizontal nudge to re-align the long-distance shot.
One detail that matters in practice: the dark mirror behaves as the system’s reference point. If at any point you cannot tell which mirror is which, the dark one is always the one that needs to be at an intersection or a redirect, and pushing it is what unsticks the chain.
Reset rules when the puzzle misbehaves
Mirror puzzles in Crimson Desert have a passive reset, and the Spire of the Sun is no exception. The rules are the same as for any of the region’s redirect-based puzzles: walk roughly one hundred meters away from the spire and wait about thirty seconds. The mirror positions, the laser state, and the gem rearm, which lets you start the chain over without leaving the area.
The faster option, and the one most players end up using, is a manual save and reload. Because the game saves the mirror positions but not the player’s experimental nudges, a reload always returns the array to a clean state. Players who are working through step five for the first time benefit from saving at the end of step four, since that is the last point at which the chain is internally consistent and the final step is genuinely additive rather than corrective.
The third reset behavior, less obvious but useful, is that the Abyss Nexus itself can be deactivated and reactivated. This is not a documented shortcut, and it does not bypass the reset distance, but on some platforms a quick deactivation cycle forces the lasers to re-evaluate the chain, which is occasionally enough to fix a marginal step-five alignment without a full reload.
Interior climb: the stair-step laser sequence
Once the ground mirror array opens the spire, the second half of the puzzle is a vertical climb. The interior is a series of mirrored landings connected by stairs that only appear when a laser is correctly aimed at a mirror above. The mechanic is simple: each landing has a mirror that emits a laser, and the player has to aim that laser at the mirror on the next landing to trigger the next set of stairs.
- Climb the first stairs and examine the first mirror. Move the laser off of the mirror’s current target and onto the mirror above. The mirror above will respond by producing a new set of stairs.
- Climb the new stairs and repeat. Each landing follows the same rule: aim the lower mirror’s laser at the mirror on the next level.
- If a set of stairs does not appear, the cause is almost always the aim point on the receiving mirror. Aiming the laser at the side of the receiving mirror instead of the center is the documented workaround and is the most common fix.
- Near the top of the spire, the geometry changes. Instead of aiming at a mirror on the next landing, aim the laser at a wall where a portal-like mirror appears.
- One level above the portal mirror, aim the laser at the very top and center of the spire. This opens the final ascent.
- Climb to the top of the spire and head through the Abyss Gate to complete the spire.
The interior climb is shorter than the ground puzzle but easier to misread, because the visual feedback is subtle. A correctly aimed mirror changes the position of the laser on the next wall, not the position of the mirror itself, and a misaligned laser still produces a visible beam, just one that does not trigger stairs.
Common failure modes and how to read them
Spire puzzles are designed to be solvable without hints, but the failure modes are consistent enough across the set that the Spire of the Sun benefits from the same triage logic.
| Symptom | Likely cause | First check |
|---|---|---|
| Gem stays dark after step five | Final mirror aimed slightly off the second distant building | Re-nudge the mirror moved in step five horizontally and vertically until the gem lights up |
| No new laser appears after step two | Cluster mirrors not flush with the original laser | Push the third mirror further into the cluster until it touches both the laser and the mirror in front of it |
| Stairs do not appear between landings | Laser aimed at the center of a mirror but the receiving mirror requires a side hit | Move the source mirror slightly so the laser strikes the receiving mirror’s edge instead of its center |
| Ground puzzle resets mid-step | Player moved too close to a patrol threshold or triggered a combat encounter near the nexus | Clear the area first, then re-engage the nexus before resuming the chain |
| Interior portal mirror does not appear | Wrong landing selected; the portal mirror only appears near the top of the spire | Confirm the current landing is the second-to-last by checking that no further stairs appear above |
The reset behavior is the most important diagnostic tool. A clean reload will tell you whether a failure is environmental or positional: if the puzzle fails the same way after a reload, the failure is environmental and you are missing a prerequisite. If it fails differently, the failure is positional and you are misaligning a mirror.
What the spire unlocks and how it fits the region
The Spire of the Sun is a side puzzle, but its reward is structural. Completing the spire opens a permanent route through the Abyss Gate at the top, which acts as a fast-travel anchor and a region modifier in the same way the other spires in Crimson Desert do. For Chapter 9 players working through the Sage of Desert chain, the spire is also a checkpoint for some of the later quest steps, because the chain uses the spire’s summit as a return point rather than a forced objective.
For players building a route through the Forebearer’s Barrens, the practical reason to clear the spire early is that the ground mirror array teaches the same redirect grammar the other spires use, but with a relatively low punishment for failure. The reset rules are forgiving, and the chain is linear, so the spire is a good entry point for the wider puzzle set.
| Spire element | Player goal | Failure cost |
|---|---|---|
| Abyss Nexus activation | Arm the ground mirror array | None; can be reactivated at any time |
| Ground mirror chain | Fire a laser from the gem into the spire | ~30 second reset or a manual reload |
| Interior stair climb | Bounce a laser up to the top of the spire | Restart at the bottom of the interior; no resource cost |
| Abyss Gate | Complete the spire and unlock its reward | None; completing the spire is the terminal state |
That last row matters. The Abyss Gate is not a “go back outside and try again” event. It is the completion state, which means a player who is uncertain about a step inside the climb should save at the base of the interior, not after passing through the gate.
Design notes: what this spire teaches about open-world puzzle structure
From a development perspective, the Spire of the Sun is a useful reference for how an open-world action RPG can stage a two-part gate without forcing the player to learn a new system. The ground puzzle reuses the mirror-redirect vocabulary that the rest of the region establishes, and the interior climb uses the same vocabulary at a smaller scale, with a different camera. The player’s only real cognitive load is reading the chain on the ground; once they understand the chain, the climb is mechanical.
The reset rules are also a deliberate design choice. Because the puzzle has a passive reset, the game can place a multi-step chain in an area with hostile patrols without making the punishment for a single misstep severe. The developer-side trade-off is that the area needs to be readable at a distance: the spire is tall enough to be visible from the surrounding plateau, the gem is a distinct color, and the dark mirror stands out against the standard mirror set, so the player can locate the puzzle from a different subregion and approach it intentionally.
For studios working on similar gates, the relevant design takeaways are simple. A multi-step redirect chain is solvable when each step has a single identifiable failure state and a known corrective action. A reset rule that is forgiving on time but strict on state (no partial saves, no mid-puzzle checkpoints) lets players experiment without trivializing the chain. And a vertical section that uses the same mechanic as the horizontal section, at a smaller scale, lets the player transfer their learning without re-reading the system.
Troubleshooting checklist before you file the puzzle as broken
When the chain refuses to complete, the cause is almost always one of four things. Working through this list in order resolves the puzzle in the majority of cases.
- Confirm the Abyss Nexus is active. A deactivated nexus produces no lasers, and pushing mirrors without a beam only seems to work because the player is pushing mirrors that are not part of the chain.
- Confirm the dark mirror is still in the system. Players occasionally push a non-dark mirror out of the array, which does not affect the chain; pushing the dark mirror into a wall, however, removes the system’s reference point.
- Confirm the cluster compression in step two. If the cluster mirrors are not flush, the chain produces a beam that points to nothing, and the player will spend time on step four that should have been spent on step two.
- Confirm the final step-five alignment. The step-five mirror is the only one that needs fine adjustment; all other steps are positional, and a small horizontal or vertical nudge on the final mirror is the standard fix for a dark gem.
If all four of these check out and the gem is still dark after a reload, the failure is environmental. The most common environmental cause is that the spire was activated before the questline had routed the player to the Crossing Point step; in that case, the puzzle is solvable, but the spire door does not respond because the quest gate has not opened the spire’s reward state.
FAQ: frequently asked questions about the Spire of the Sun in Crimson Desert
Where is the Spire of the Sun located in Crimson Desert?
The Spire of the Sun is in the Forebearer’s Barrens, a subregion of the Crimson Desert region. It is visible from the surrounding plateau as a tall stone column, and its map marker becomes meaningful once the Chapter 9 Sage of Desert questline has progressed to the Thinning Blade – Crossing Point step.
Do I need to finish the Sage of Desert questline to enter the spire?
You do not need to finish the questline, but you do need to reach the Thinning Blade – Crossing Point step. The spire’s map marker, its Abyss Nexus interaction, and the spire’s reward state are all gated by that quest step. Reaching the spire earlier is possible, but the puzzle does not respond correctly until the questline has caught up.
What is the Abyss Nexus, and where do I find it?
The Abyss Nexus is the interaction point on the upper level of the spire, on the northeast side, adjacent to two sets of ruins. Activating it arms the ground mirror array and is a prerequisite for the ground mirror puzzle. Without an active nexus, the mirrors can still be moved, but no lasers are produced.
How do I solve the mirror puzzle on the ground?
The solution is a five-step chain. Clear the gem’s line of sight by moving the mirror in front of it, compress the cluster of three mirrors so the original beam passes through cleanly, redirect the resulting eastward beam with the dark mirror, position the dark mirror at the intersection of the four octagon pattern, and align the final mirror with the second of three distant buildings. Once the gem fires, the spire door opens.
Why is one mirror in the array darker than the others?
The dark mirror is the system’s reference point and the linchpin of the chain. It is the mirror that needs to be moved at the redirect steps, and it is the mirror that has to sit at the four octagon intersection. The visual difference is intentional and is the player’s main cue for which mirror to interact with when the chain stalls.
How do I reset the mirror puzzle if I get stuck?
There are three reset options. The passive reset is to walk about one hundred meters away and wait thirty seconds for the mirrors to return to their default positions. The faster option is to save and reload, which returns the array to a clean state instantly. The third option is to deactivate and reactivate the Abyss Nexus, which forces the lasers to re-evaluate without a full reload.
What do I do if a set of stairs does not appear in the interior climb?
Aim the source mirror so the laser strikes the side of the receiving mirror rather than its center. This is the documented workaround for landings where the center-aim fails, and it is the most common reason a set of stairs does not appear on the first try.
What is at the top of the Spire of the Sun?
The top of the spire is the Abyss Gate. Passing through the gate completes the spire and unlocks its reward, which functions as a fast-travel anchor and a region modifier in the same way the other Crimson Desert spires do. The gate is the terminal state of the puzzle; there is no return loop.
Can I save inside the spire during the interior climb?
You can save at any point in the spire, but the cleaner pattern is to save at the base of the interior before starting the climb. Saving inside the climb is safe, but the interior is short, and a single reload is usually enough to restart the climb without losing meaningful progress.
Is the Spire of the Sun puzzle required for the main story?
The spire is not required for the main story, but it is required for some of the later Sage of Desert quest steps, which use the spire’s summit as a return point. Players who skip the spire can still finish the main story, but they will need to clear it before the late-game questline resolves.
For a verified walkthrough of the puzzle and the surrounding map details, the Spire of the Sun location and solution guide on the Crimson Desert wiki covers the same redirect chain in step-by-step form, including the same ground mirror order and the same interior climb. For a broader look at how redirect chains shape open-world navigation in this style of RPG, the Pearl Abyss studio background on Wikipedia is a useful reference for the development context of Crimson Desert and the way the studio has approached open-world structure in its previous titles.
Players who want a different kind of side puzzle in the same style of open-world design can also look at how lunar maze structure works in a different setting, since the readability lessons are similar. For a more combat-oriented side objective with a similar gating pattern, the vehicle mechanics and build choices in Borderlands 4 breakdown covers how a side system uses the same “small readable puzzle, generous reset rules” design pattern, and for environment art direction, the concept art services guide for developers is a useful reference for how a studio plans the visual cues a puzzle like the Spire of the Sun needs to be readable from a distance.
