
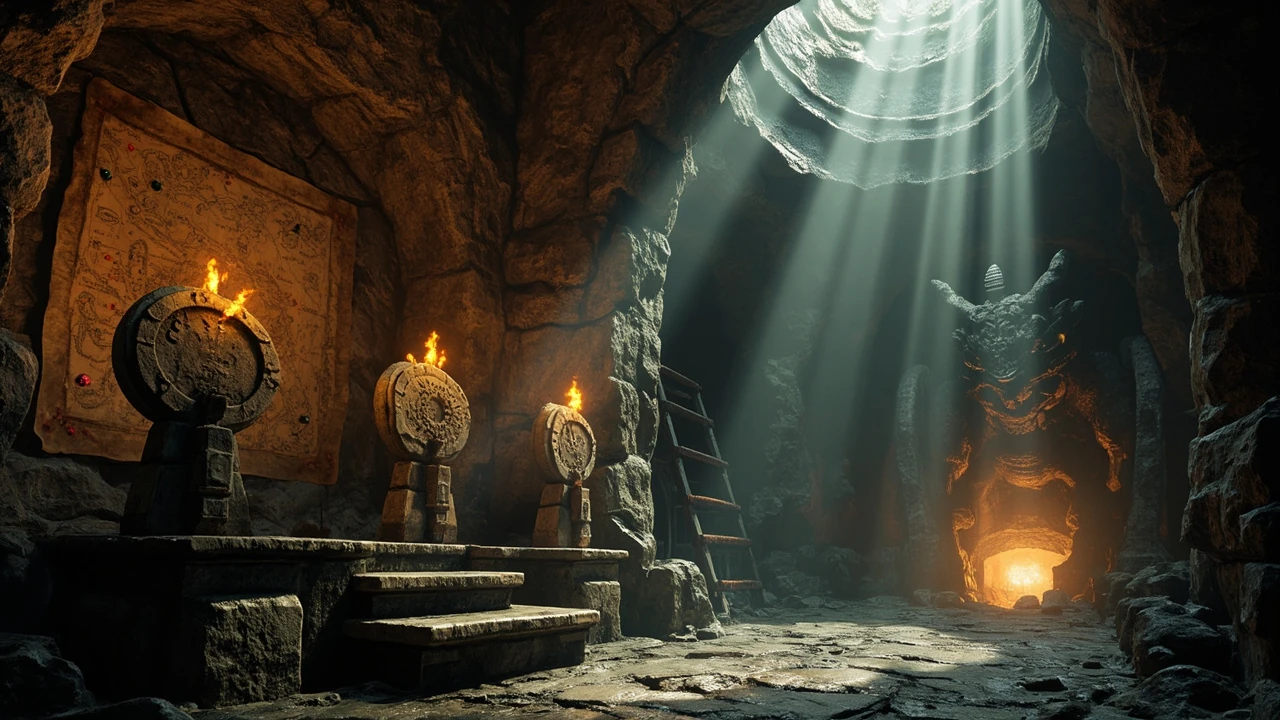
Crimson Desert Dragon Stone Chamber: how the puzzle works and what the world is teaching you
The Crimson Desert Dragon Stone Chamber is one of the early optional dungeons in the Hernand region: a small cavern dug beneath the Greymane Camp, sealed behind a closed door underneath a dragon statue, and fronted by three carved dials that must be rotated until their faces match three reference images on a back wall. The puzzle itself is short, but the design decision behind it is interesting. The chamber does not hand the player a key, an inscription, or a friendly NPC explaining the combination. Instead it points at the open world and assumes you will read it. For a level designer or quest systems designer, the chamber is a small but clean case study in the kind of “diegetic hint” structure that open-world games are slowly rediscovering as alternative quest bloat becomes its own design problem.
What follows is a practical walkthrough built from the verified solution, followed by a longer look at why this dungeon is structured the way it is: how the three dials, the wall map, the cliff paintings, and the rewards all fit together as a teaching layer for the wider game. The walkthrough is the answer. The rest is the design context that an experienced reader can use to compare the chamber to similar puzzles in other open-world RPGs.
The Dragon Stone Chamber at a glance
Before going into dial positions, it helps to anchor the location, the prerequisites, and the reward structure. The table below captures what the chamber expects from the player and what it gives back. None of these are guesses: each row corresponds to a detail the source material confirms.
| Element | Verified detail | Design implication |
|---|---|---|
| Region | Hernand, accessed from Greymane Camp | Early-game placement, close to the player’s first hub |
| Entrance | Open pit in the middle of the chamber floor | Vertical drop rather than a corridor, signals “optional” without locking the player out |
| Puzzle object | Three pattern dials mounted on a central plinth | Forces the player to interact with the world rather than read a journal entry |
| Reference image | Three reference images on the back wall | Goal state is visible from the start, reducing frustration |
| Hint source | Shadowy regional map on the wall with red markers | Pointer to cliff paintings scattered around the world |
| Solve method | Match each dial face to its reference image | Pattern matching, not a number combination or letter code |
| Reward set | Abyss Creset (fast travel), Artifact (skill unlock), Memories of Abundance item | Combines traversal, build, and map-reveal rewards in one chest |
| Optionality | Fully skippable; no story gate | Player chooses engagement with the teaching layer |
Step-by-step solution: setting the three dials
The mechanical answer is short. Spin each dial until the carved face matches the corresponding reference image on the wall. The specific positions, taken from the verified guide source, are as follows:
- Left dial: rotate until the sun and moon face sits at the top of the dial.
- Middle dial: rotate until the spindly arm face points to the left.
- Right dial: rotate until the outside spiral face sits in the bottom-left quadrant.
Once all three faces are set, the door beneath the dragon statue opens. The chamber does not require keys, consumables, or prior quest completion. It is a pure pattern-matching gate, which is the first design lesson: the puzzle tests observation, not inventory.
A common player mistake is to treat the dials as numbered inputs. They are not. The face you are matching is a pictographic symbol, not a digit. If a dial is “almost right” but the symbol sits one tick off, the door will not open, and there is no failure animation to tell you that you are close. The chamber quietly waits for a perfect match. That silence is intentional: it removes the dopamine feedback loop of small partial rewards and reframes the puzzle as a single, complete observation.
How the wall map and the cliff paintings actually work
Most players will solve the chamber by following a guide. The interesting design question is what the chamber would do if you did not. The answer is in the wall map and the cliff paintings.
On the back wall of the chamber there is a faded regional map with several points marked in red. Those markers are not decorative. They correspond to large cliff paintings scattered around the wider Hernand area, generally clustered near Anvil Hill. Each painting reproduces one of the three reference images the chamber uses: a sun-and-moon symbol, a spindly arm, and a spiral. The intended loop is:
- Enter the chamber, see the three dials, fail to solve it.
- Notice the wall map and its red markers.
- Leave the chamber, ride or run to each marked location.
- Find the cliff painting, recognize that it matches a dial face, and remember it.
- Return to the chamber, set the dials, open the door.
For a level designer, the chamber is a compact example of “distributed teaching”: instead of an NPC telling the player the answer, the world is tiled with the answer, and the player has to triangulate it. This approach has trade-offs, which the section below covers.
Why the chamber skips a text tutorial: a designer’s read
Open-world RPGs tend to solve the question “how does the player learn a puzzle mechanic?” in one of three ways. The Crimson Desert Dragon Stone Chamber uses a fourth, and the choice is worth examining.
| Approach | How it teaches the puzzle | Risk | Where the chamber fits |
|---|---|---|---|
| Explicit tutorial | NPC dialogue or journal entry explains the rule | Breaks immersion, slows pacing, repeats what experienced players already know | Not used here |
| In-room observation | All clues live in the puzzle room itself | Forces a trial-and-error loop, can feel like guessing | Partial use: the reference images and dials live in the room |
| External fetch quest | Player must travel to a specific NPC or location for the answer | Can feel like padding, especially for short puzzles | Not used here |
| Distributed environmental teaching | Multiple optional sites in the world each reveal part of the answer | Some players will never see the clues; “missing” the intended path becomes normal | This is the approach the chamber uses |
The chamber’s choice to scatter the answer across cliff paintings is honest about the player’s likely behavior. Most players will look up the solution. The chamber is built for the player who does not, and the design accepts that the guide-driven path is the common one. That is a defensible position in 2026, when discovery-based content is competing with short attention spans and well-indexed online guides. The chamber preserves the feeling of a hidden world for players who want it, without punishing the players who do not.
Reading the rewards: what the chamber is actually giving you
The reward set is where the chamber’s design priorities become clearest. Three items drop from the chest, and each one is teaching the player a different system in the game.
- Abyss Creset: a fast-travel anchor. Placing it here anchors a region the player is still learning, and gives the chamber a permanent traversal payoff even after the puzzle is forgotten.
- Artifact: a skill unlock item. This teaches the player that exploration, not just combat or story, is a legitimate source of build progression.
- Memories of Abundance: a single-use inventory item that, when activated, reveals additional caves and points of interest on the world map around Hernand. It is a map-reveal item disguised as a story item, and it teaches the player that map fog can be lifted by engaging with optional content.
Together the three rewards are a quiet tutorial in three different game systems. A designer looking at the chamber as a template can see that the puzzle itself is the smallest part of the content. The reward bundle is the actual product, and the puzzle is the price of admission.
Common failure modes and what they tell you about the design
Because the chamber is fully optional and silent about its own state, several predictable player failures appear. They are worth listing because each one is a small piece of feedback the design chose not to give.
- “The dials do nothing.” The chamber has no obvious interaction prompt until you stand at the correct angle. Players who approach from the wrong side of the plinth may believe the puzzle is bugged.
- “I matched two of three.” The door stays closed. The chamber does not light up the dials you have correct, so the player has to recheck all three. This rewards systematic checking and punishes trial-and-error loops.
- “Where do I find the symbols?” The wall map’s red markers are small and faded. Without source-of-truth guidance, the player has to discover the cliff paintings organically, which most will not.
- “The fast travel point is in an awkward spot.” Even the source guide notes that the Abyss Creset is not placed in an ideal location, and that the player may already have a more useful anchor from the Thinker’s Meadow puzzle. This is an honest tradeoff: traversal reward is real, but minor.
Each of these failures is a design choice. None of them are bugs. For developers, the chamber is a useful reminder that “no feedback” is itself a feedback choice, and that optional puzzles carry an obligation to remain forgettable rather than frustrating.
Where the Dragon Stone Chamber sits in a typical Crimson Desert run
Because the chamber sits beneath Greymane Camp, it tends to enter a player’s route during the first or second exploration pass through Hernand. Its position relative to other optional content shapes how it feels.
| Nearby optional content | What it asks of the player | How the chamber compares |
|---|---|---|
| Thinker’s Meadow puzzle | A more centrally located fast-travel reward | Chamber’s fast travel feels redundant once Thinker’s Meadow is solved |
| Cliff paintings near Anvil Hill | Travel, observation, optional discovery | Chamber is the payoff for visiting the paintings in any order |
| Greymane Camp itself | First hub, vendors, basic services | Chamber is the camp’s “secret basement” content, not a primary quest |
| Hernand Castle and Alchemist’s Chamber | Story-gated access with higher-stakes rewards | Chamber is more accessible but less lucrative than castle content |
The pattern this table exposes is typical of modern open-world design. Optional puzzles form a small ecosystem of competing rewards, and the player chooses which ones to engage with based on personal interest rather than quest markers. The Dragon Stone Chamber is calibrated to be skippable, modest in payoff, and complete in itself. That calibration is a deliberate answer to the criticism that open-world games have too much mandatory filler.
What a developer can borrow from this structure
If you are designing an optional puzzle for an open-world RPG, the chamber is a clean reference point. The most portable ideas are the ones that translate to projects smaller than a full AAA release.
- Make the goal state visible. The reference images on the wall are in the room. The player never has to guess what success looks like. This is cheap to build and dramatically reduces frustration.
- Push the hint into the world, not the UI. The wall map and the cliff paintings are part of the level art. There is no journal entry, no waypoint, no quest tracker entry. The teaching is diegetic.
- Reward three different systems per chest. Traversal, build, and map reveal each get one item. This teaches the player that optional content is multi-system, not just a loot table.
- Accept that most players will use a guide. Design for the player who does not, and make sure the guide-driven path still feels complete and rewarding.
- Keep the failure state silent. No flashing red dial, no “incorrect” sound. The puzzle resets without commentary. This is a stylistic choice, and it works because the puzzle is optional and the rewards are modest.
None of these ideas are new. The chamber combines them in a small, self-contained package, which is what makes it useful as a teaching example for a junior designer or a small team building their first open-world content set.
Limitations of this analysis
Two honest caveats apply. First, the verified source for the puzzle solution is a single published guide, and the design interpretation here is editorial reasoning layered on top of that source. The chamber may have additional internal documentation, telemetry, or post-launch patches that change the picture, and that evidence is not in scope here. Second, the Hernand region continues to receive updates, and the relative value of the chamber’s rewards can shift as new content is added around it. The structural observations about how the puzzle works, however, do not depend on tuning changes.
For a developer, the takeaway is that this kind of optional puzzle is robust to balance changes precisely because it is small, optional, and quiet. That is part of why it is worth studying.
Internal reading on related level design and exploration systems
For readers who want to compare the chamber against similar design problems, two articles from this site’s catalog go deeper into adjacent systems. The piece on cursed tomb treasure locations covers a different optional treasure design, and the analysis of a lunar maze that holds player attention looks at how a single contained space can carry a longer exploratory arc than the Dragon Stone Chamber attempts.
Frequently asked questions
Where is the Crimson Desert Dragon Stone Chamber?
The chamber sits underneath the Greymane Camp in the Hernand region. The entrance is a pit in the middle of the chamber floor; you drop down into the room rather than walking in through a corridor. Because the camp is an early-game hub, most players will pass near the chamber during their first or second exploration pass through the area.
What is the solution to the three dials?
Set the left dial so that the sun-and-moon face sits at the top, the middle dial so that the spindly-arm face points to the left, and the right dial so that the outside-spiral face sits in the bottom-left. Once all three are correctly aligned, the door under the dragon statue opens. There is no numbered input and no order dependency; each dial is a standalone pattern match.
Do I have to find the cliff paintings to solve the puzzle?
No. The cliff paintings are the diegetic hint path the chamber offers to players who do not want to use a guide. The wall map inside the chamber points to several large cliff paintings around Anvil Hill, each showing one of the three dial faces. If you already know the answer, you can ignore them entirely.
What do I get for solving the Dragon Stone Chamber?
Three items: an Abyss Creset for fast travel, an Artifact you can use to unlock a new skill, and a single-use inventory item called Memories of Abundance. When activated in the inventory, that item reveals additional caves and points of interest on the world map around Hernand.
Is the Abyss Creset from the chamber worth using?
It is a legitimate fast travel point, but it is not placed in an especially useful spot, and the player may already have a more central anchor from the Thinker’s Meadow puzzle nearby. Treat the Creset as a small bonus rather than the main reason to clear the chamber. The Artifact and the Memories of Abundance item are usually the more interesting rewards.
Can the puzzle soft-lock?
The chamber is fully optional and does not gate any required quest, so there is no soft-lock risk in the conventional sense. If the dials are unresponsive, the most common cause is the player standing too far from the plinth or approaching from the wrong angle. Walk up to each dial until the interaction prompt appears, then rotate it one face at a time.
Does the chamber change after solving it?
Once the three dials are set and the door opens, the chest is looted and the chamber is functionally complete. The dials do not need to be reset, and there is no second-stage puzzle. The room remains physically present, which is useful if you want to revisit the wall map or the visual design.
Is the Dragon Stone Chamber good design?
It depends on what you mean by “good.” The chamber is a small, optional, self-contained puzzle that uses distributed environmental teaching rather than text, and it rewards three different systems from a single chest. For developers, it is a clean example of how a low-cost puzzle can carry real design weight. For players, it is a short, optional diversion whose rewards are modest but legitimate. Both readings are defensible.
Why did the developers scatter the answer across the world?
Scattering the answer across cliff paintings turns the puzzle into an exploration reward rather than a single-room brainteaser. The player who follows the wall map gets a longer, more memorable experience; the player who does not still gets a complete and rewarding solve. It is a deliberate design tradeoff that accepts lower discoverability in exchange for higher immersion.
Where can I read the verified solution in more detail?
A walkthrough of the puzzle, including the dial positions, the cliff painting locations, and the reward breakdown, is documented in GamesRadar’s Dragon’s Stone Chamber puzzle solution, which provides useful background for this point. That page is the source for the mechanical details here and is a useful primary reference if you want to compare notes.
