
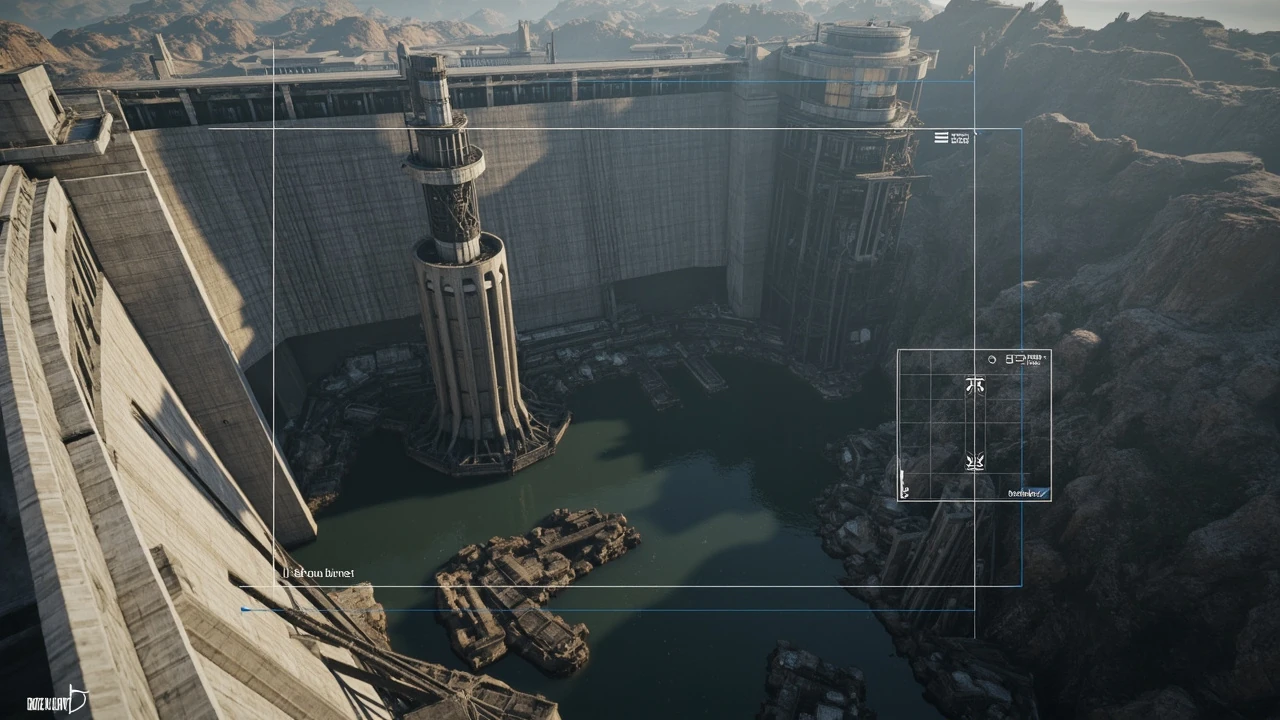
Dam battlegrounds map: design and engineering notes for a working prototype
A dam battlegrounds map is a multiplayer arena built around a hydroelectric dam, a floodable canyon, and the infrastructure that ties them together: spillways, intake towers, turbine halls, control rooms, switchback service roads, and the low ground that disappears once the water rises. It looks spectacular, which is exactly why so many prototypes stall in pre-production. The map has too many moving parts for a single designer to balance alone, the flood mechanic punishes anything that was not built with water in mind, and a single level block that floats incorrectly can collapse weeks of playtest data.
This guide is for the developer, level designer, or technical artist who has been handed a brief that says “make a dam battlegrounds map” and needs to turn it into a shippable arena. It is grounded in level-design fundamentals, multiplayer performance budgets, and the practical problems that appear the first time you raise the water level during a playtest. It is not a tutorial for a specific engine, a specific studio title, or an unannounced title; it is a framework you can adapt to the engine your team already uses.
By the end you should be able to scope a dam battlegrounds map, choose a flood mechanic that fits your performance budget, lay out a playable arena that still works when half of it is underwater, validate the result with a small playtest, and recognize the moment a feature is no longer worth its cost.
Why the dam archetype keeps showing up in multiplayer arenas
Multiplayer arena designers return to dams because the setting provides three things most shooters and hero shooters struggle to invent: verticality, a single visual focal point, and a reason for the terrain to change during a match. A dam wall is a hard, readable landmark that players can use for navigation and callouts. The canyon downstream is a natural kill box if you are defending from the top, and a natural bottleneck if you are attacking from below. The turbine hall and control room give interior combat a reason to exist, and they connect the top of the wall to the low ground through a series of service tunnels and ladders that read as authentic rather than contrived.
What makes the dam battlegrounds map a genuine design problem is the water. The map can be designed as a static arena with a dam as flavor, or it can be designed as a dynamic arena where the dam does something during the match. The first is easier to ship and far less interesting. The second is the version players remember, and it is the version that drives most of the engineering risk in the project. Once a designer commits to a flood mechanic, every other system on the map has to be re-evaluated.
Understanding that choice, static versus dynamic, is the first decision the team needs to make, because almost every other decision flows from it.
Static versus dynamic dam maps: pick the version you will actually finish
A static dam map uses the dam as a setting and a navigation aid, but the water level and the dam’s behavior do not change during a match. The match plays out across the wall, the turbine hall, the control room, the downstream canyon, and the service roads, with the spillway and reservoir as readable landmarks. This is the cheaper option: no flood system, no dynamic water surface, no destruction, no per-frame changes to the level geometry, and far fewer playtests required to reach a shippable state.
A dynamic dam map treats the dam as an interactive object. Players can open sluice gates, damage spillway sections, blow a turbine hall, or trigger an objective that raises the water level on a timer. The downstream area floods, low-ground cover becomes unusable, and the map’s playable area effectively shrinks or shifts during the match. The dynamic version is what most teams imagine when they start the project, and it is also the version that is most often cut late in production because the cost of supporting changing water in a multiplayer game is high.
The decision should be made on the first day of pre-production, not the last week, because every later system has to be designed against whichever choice is made. A team that decides in week 16 that the dam should flood is going to rebuild half of its collision, half of its nav mesh, and most of its performance budget.
Designing the layout so the map still works when the water rises
Once you know whether your dam battlegrounds map is static or dynamic, the next decision is the layout itself. The classic structure splits the map into four readable zones: the reservoir and dam wall at the top, the control room and turbine hall in the middle, the service tunnels and switchback roads connecting the two, and the downstream canyon at the bottom. Each zone has a role, a sightline budget, and a set of cover objects that match its height.
The reservoir and dam wall form the high ground. This is where defenders anchor and where attackers feel exposed. The dam wall itself is a strong landmark but a weak combat surface unless you add catwalks, intake tower tops, and gated spillway sections that give players something to stand on. The wall should have a clear top, a clear front face, and a clear set of access points so the playtest can answer the question “how did the defender get up there” without hand-waving.
The control room and turbine hall form the interior middle. They are where the map’s narrative lives, and they are where most of the close-quarters combat happens. The control room should be a small, defensible space with one main entrance, one side entrance, and a vertical exit through the ceiling or floor. The turbine hall is a larger, more chaotic space with high ceilings, multiple floors of catwalks, and at least one sightline that connects to the control room. Both should feel claustrophobic compared to the wall and the canyon.
The service tunnels and switchback roads connect the high ground to the low ground. They are easy to under-design, and they are usually the zone that determines whether the map feels good. If the service roads are a straight line down the canyon wall, the match becomes a long-distance fight. If they are a series of switchbacks with cover on every corner, the match becomes a series of close-range duels. The shape of these routes is the shape of your match.
The downstream canyon is the low ground and the kill box. It is where attackers spawn or push from, and it is where the flood hits first if the map is dynamic. The canyon needs enough cover to make a frontal assault possible without making it easy. The cover has to be tall enough to hide a player crouching, short enough that a player on the dam wall can see over it, and stable enough that flooding does not move it.
Flood mechanics: which one fits your engine, your budget, and your match length
If you commit to a dynamic dam battlegrounds map, the flood mechanic is the most expensive decision you will make. The four common options are: a rising water plane, a series of timed wave events, a set of destructible spillway sections, and a hybrid where the water level changes in phases tied to objective progress.
A rising water plane is the simplest dynamic option. The water surface moves from the canyon floor upward on a fixed schedule, and any object below the surface is either submerged or floats. The visual effect is strong, but the implementation has to handle submerged collision, partially submerged actors, and the player experience of moving through water that slows movement and obscures vision. Submerged collision is the part most teams underestimate. If your physics engine treats water as a trigger volume, the player walks through the bottom of the canyon. If it treats water as a solid, the player gets stuck on a slope that should be passable. Both bugs are common in early prototypes, and both will eat playtest time.
Timed wave events use repeated floods rather than a single rising tide. The dam is breached at set intervals, the canyon fills, the water recedes, and the cycle repeats. This is easier to validate because the game state returns to a known configuration between waves, and it gives players a recovery window where the map is fully playable. It is also easier on the networking model because the flood is a discrete event with a clear start and end, not a continuous change to the world state.
Destructible spillway sections let players open the dam rather than waiting for the game to do it. A coordinated team can breach the wall early and force the flood. This is the most interactive option and the most expensive. Destructible geometry in a multiplayer game has to be replicated across the network, validated by the server, and recoverable when the server rewinds state. If the destruction is client-side only, players will see different wall shapes on different screens and the match will be impossible to referee.
A hybrid flood ties the water level to objective progress. The dam does nothing at the start of the match, and the first sluice gate opens when the attacking team captures the control room. The second gate opens when the turbines are disabled. The final breach happens at the match’s climax. This is the version that feels most like a narrative and the version that gives the defending team a reason to fight for each control point. It is also the version with the most moving parts and the most failure modes.
Pick the option that matches the match length your game is designed for. A two-minute match cannot support a rising water plane; the flood would end the match before it began. A twenty-minute match cannot support timed wave events; the players would ignore the water. Most competitive multiplayer matches live in the four-to-twelve-minute window, and that window is where a hybrid flood or a single timed breach fits best.
Multiplayer performance: where the dam map will hurt your frame budget
A dam battlegrounds map is expensive for three reasons: water rendering, large open sightlines, and the combination of interior and exterior lighting. Each of these is a known cost in modern engines, but the dam map hits all three at once, which is why teams often see their first real performance regression on a level like this.
Water rendering is the obvious cost. Reflective water surfaces, especially when they reflect dynamic geometry and dynamic lighting, are one of the most expensive effects a real-time renderer can produce. A dam with a reservoir at the top and a flooded canyon at the bottom gives you two water surfaces, each with a different size, each with a different reflection target, and often each with a different material setup. The fix is not to remove the water; the fix is to budget the water. Decide which water surface is the hero, give it the full reflection treatment, and reduce the cost of the secondary surface with a cheaper shader, a lower-resolution reflection, or a single static cubemap. Most players will not notice the difference, and your frame budget will thank you.
Large open sightlines are the second cost. The canyon below the dam is exactly the kind of space that punishes overdraw: many objects, all visible at long range, all lit by the same directional light, all casting shadows into the same shadow map. The standard fixes apply: split the canyon into multiple shadow casters with culling distances, reduce the shadow map resolution on the canyon floor, and use baked lightmaps for static objects where the engine supports them. The dam wall itself is a single large object that will eat a shadow map if you let it; clip the wall into a hero section with a high-resolution shadow and a tail section with a low-resolution or no shadow.
The interior and exterior lighting combination is the third cost. The turbine hall is a dark interior lit by point lights, the dam wall is a bright exterior lit by the directional sun, and the player’s eye is constantly moving between the two. Modern engines handle this with screen-space global illumination, virtual shadow maps, and probe-based lighting, but each of those has a budget and the dam map eats all three. The fix is to commit to a single lighting story for the match. If the match takes place in daylight, the turbine hall should have large windows and a reason to be lit by sunlight. If the match takes place at night, the dam wall should have spotlights that read as intentional. Mixing both because both look good in isolation is the most common lighting mistake in dam maps.
Navigation, spawns, and the geometry of a fair fight
A dam battlegrounds map is asymmetric by nature: the defenders have the high ground, the attackers have the numbers, and the geometry usually favors one side until the flood changes things. The job of the level designer is to make that asymmetry feel intentional rather than unfair, and the way to do that is to control spawns, sightlines, and the timing of the map’s events.
Spawn placement is the most important decision after the layout itself. Defenders should spawn in the reservoir area with at least one safe path to the dam wall and at least one safe path to the control room. Attackers should spawn downstream, in cover, with a route that does not require them to cross an open canyon to reach the dam. If both teams can spawn in the same place, the spawn system needs to break ties, and most spawn systems break ties in ways players will complain about.
Sightlines should be designed to reward positioning, not reflexes. The For additional context, dam wall should give defenders long sightlines across the canyon, and the canyon should give attackers short sightlines into the wall. This is the classic high-ground-versus-cover trade, and it is the reason the dam archetype works at all. The mistake is to give both sides the same sightline, which turns the map into a long-range duel and rewards whoever has the better aim assist.
Cover placement is the third leg. Cover in a dam map has three jobs: it has to hide a crouching player, it has to break a long sightline, and it has to survive the flood if the map is dynamic. The third job is the one most often missed. Cover that floats, cover that gets pushed by the water, and cover that sinks below the water surface are all common bugs in dam prototypes, and all three will ruin a match if they appear in shipping.
Designing the dam map around an actual historical engagement can also help anchor the layout in a believable geometry. The 1813 engagement at Beaver Dams, where a small British detachment supported by native warriors turned back an American column after Laura Secord’s warning, shows how terrain, a defensible stone structure, and a single approach road can produce a memorable match even with a tiny force. A multiplayer version of that encounter would lean on the same principle: a strong anchor, a single funnel, and a chance for the defending team to use the ground to offset a numbers disadvantage.
Tables that organize the design decisions
The next two tables summarize the decisions a team will make during pre-production. They are decision aids, not standards. Use them to make sure the team has answered the questions they need to answer before they start blocking out the level.
Static versus dynamic dam map: trade-offs at a glance
| Attribute | Static dam map | Dynamic dam map |
|---|---|---|
| Match length support | Any length | Usually 6-15 minutes |
| Networking cost | Low; world state is stable | High; flood events are replicated |
| Art and VFX cost | One water surface or none | Two or more water surfaces with dynamic reflection |
| Playtest cycles to ship | 5-8 | 10-20 |
| Risk of late redesign | Low | High if dynamic elements are added late |
| Player memory of the map | Moderate | Strong, if the flood reads as intentional |
Flood mechanic options and their hidden costs
| Flood type | Visual effect | Networking cost | Main failure mode |
|---|---|---|---|
| Rising water plane | Strong and continuous | Moderate; per-frame state changes | Submerged collision bugs |
| Timed wave events | Strong at the moment, resets between waves | Low; discrete events | Wave timing feels arbitrary if not tied to objectives |
| Destructible spillway | Strongest, player-driven | High; replicated destruction | Desync between client and server wall shapes |
| Objective-tied hybrid | Strong, narrative-driven | High; multiple event triggers | Cascading bugs when one phase fails |
Art and technical art: the props that sell the dam
The art team carries a lot of the dam map’s identity. The concrete has to read as concrete, the rust has to read as rust, the water has to read as water, and the turbines have to read as actual turbines rather than as cylindrical placeholders. The cheapest way to sell the setting is to invest in a small library of high-detail props and reuse them aggressively. The most expensive mistake is to model every piece of infrastructure from scratch, which is how a dam battlegrounds map grows from a six-month project to a two-year project.
Most of the dam’s identity comes from a tight set of props: the spillway gates, the intake tower grates, the turbine housings, the control panels, the cable runs, the catwalk railings, the service ladders, and the floodlights. Model these well, build a small set of variants for each, and use them across the wall, the control room, the turbine hall, and the service tunnels. The player’s eye will accept a reused prop in a new context if the prop is detailed enough to look intentional, and a low-detail prop reused four times in a row will break the illusion.
Materials are the second priority. Concrete should have a normal map, a roughness map that varies with age, and a subtle color variation that suggests weathering. Metal should have a different roughness profile than the concrete, and the rust patches should be a separate material instance rather than a painted texture, so they can be reused on different objects. Water should have a separate material from the player’s traversal logic; the visual material is a shader, the traversal logic is a separate system, and the two should be decoupled so the art team can iterate on the look without breaking the gameplay.
Lighting is the third priority and the one that pulls the whole map together. A dam at dawn looks different from a dam at noon, which looks different from a dam at night, and the choice of time of day changes how every other system feels. Pick a time of day early in the project, light the reference blockout against that time of day, and let the art and lighting teams iterate from there. Switching from noon to dusk in week 20 is one of the most expensive decisions a team can make, because every light has to be re-tuned and every material has to be re-validated against the new exposure.
Audio design: water as both atmosphere and gameplay signal
Audio is often the last system considered for a dam map, and it is the system that can do the most for the least cost. Water is a powerful audio source because it masks footsteps, provides a directional cue for distance, and changes the player’s aural context the moment the flood begins. The mistake is to treat water as a single ambient loop. A working dam battlegrounds map needs at least four water layers: the reservoir ambient, the spillway rumble, the turbine hall hum, and the canyon echo. Each layer has a different frequency profile, a different spatial footprint, and a different role in the mix.
The reservoir ambient is the high-frequency surface noise that suggests a large body of water without dominating the mix. It is the layer players will hear from the dam wall and from the upper catwalks. The spillway rumble is the low-frequency sound of water moving through the gates, and it is the layer that gives the dam its sense of scale. The turbine hall hum is the mechanical sound of the generators running, and it is the layer that makes the interior feel like a working facility rather than a hollow box. The canyon echo is the long-tail reverb that gives the downstream area its sense of openness, and it is the layer that makes the low ground feel dangerous.
For dynamic dam maps, the audio system has to react to the flood. The most useful trick is to cross-fade the layers based on the water level: as the reservoir empties, the spillway rumble rises; as the canyon fills, the ambient layer gains low-frequency content and the echo tail shortens. Done well, the player hears the flood before they see it, which is exactly the cue they need to reposition.
Playtest planning: what to measure before you ship the blockout
A dam battlegrounds map needs more playtests than a typical multiplayer arena, and the playtests need to be structured, because the map has more failure modes than a simpler level. The first playtest should be a paper test with two players and a designer talking through the map. The second playtest should be a gray-box test with placeholder geometry, which is where the layout is validated. The third playtest should be a texture test with final art on a blockout, which is where the lighting and the materials are validated. The fourth playtest should be a feature test with the flood mechanic turned on, which is where the dynamic system is validated. Anything beyond the fourth playtest is a polish cycle.
Each playtest needs a short list of questions it is meant to answer, and the questions need to be specific. “Is the map fun” is not a useful question. “Can the attackers reach the control room without crossing an open sightline for more than four seconds” is a useful question. “Do defenders feel anchored to the dam wall” is a useful question. “Does the flood change the players’ route choice” is a useful question. Write the questions down, run the playtest, capture the answers, and use the answers to drive the next iteration.
The data to capture during a playtest is also specific. Spawn death time, time to first engagement, average engagement distance, route choice at each junction, and the player’s stated reason for choosing that route. Avoid the temptation to capture every metric the analytics system supports; the team will drown in data and miss the patterns. Three to five metrics per playtest, captured consistently, is more useful than thirty metrics captured inconsistently.
Common failure modes in dam battlegrounds prototypes
Most dam battlegrounds prototypes fail for one of three reasons: the flood mechanic is bolted on, the lighting is inconsistent, or the cover is wrong. The flood mechanic is the most common. Teams design a beautiful static dam, decide late that it should flood, and then spend the rest of the project trying to retrofit a system that was never part of the level’s bones. The fix is to decide on the first day whether the map is static or dynamic, and to commit.
Inconsistent lighting is the second most common failure. A dam map that mixes bright sunlight on the wall with dark interior lighting and a moody night-time canyon will confuse the player’s eye and burn through the frame budget. The fix is to pick a single time of day and a single lighting story, and to validate every zone against that story.
Wrong cover is the third. Cover that is too short exposes crouching players. Cover that is too tall blocks the long sightlines the map is designed around. Cover that floats when the water rises breaks the flood mechanic. Cover that sinks below the water level breaks the flood mechanic differently. The fix is to test cover at crouch height, at standing height, and at flood height, and to remove or replace any prop that fails any of the three tests.
Production checklist for a shippable dam battlegrounds map
Before the team signs off on the map, the following list should be reviewed. It is not exhaustive, but it covers the categories that most often produce shipping bugs.
- Static or dynamic decision documented in the design brief, with the flood mechanic named.
- Layout zones finalized: reservoir, dam wall, control room, turbine hall, service tunnels, downstream canyon.
- Spawn placements validated by at least one full match per side.
- Sightline map drawn for each zone, with long-range and short-range sightlines marked.
- Cover tested at crouch height, standing height, and flood height.
- Lighting time of day locked, with all zones validated against that time of day.
- Water rendering budget set: hero surface, secondary surface, fallback material.
- Shadow map budget set per zone, with culling distances tuned.
- Flood event networking model validated, with desync tested across all supported platforms.
- Audio layers cross-fade against flood level, with the cue audible before the visual change.
- Playtest metrics captured for at least three full matches per side.
- Performance pass on minimum-spec hardware with the flood active.
Integrating the dam map into the wider game
A dam battlegrounds map rarely ships alone. It is usually one of a rotation of maps, and it has to fit into matchmaking, progression, anti-cheat, and the broader monetization model if the game has one. The team that designs the map in isolation often produces a level that feels off in the live game, because the map’s match length, the time-to-engagement, and the reward structure were all designed against the map in isolation rather than against the rest of the rotation.
The simplest integration check is to play a full session of the live game with the dam map inserted at the rotation point. Watch the match length, watch the post-match screen, watch the player’s next match. If the dam map produces match lengths that are outliers, if it produces engagement patterns that don’t match the rest of the rotation, or if it produces frustration that bleeds into the next match, the map has an integration problem. The fix is rarely a redesign; the fix is usually a small tuning change that brings the map into line with the rest of the game.
If the team is building a small portfolio of multiplayer levels, the dam map should be one of the more expensive entries, because it carries the most production risk. Pairing it with a simpler level, a closed interior, and an open urban map is a common rotation pattern, because it gives players a recognizable contrast without exhausting the team’s art and engineering capacity.
Performance budgets and the moment to stop
Every dam battlegrounds map has a moment where adding more is a worse decision than shipping what is already there. That moment is usually a Tuesday in the last third of the project, when the team is sitting on a feature that would make the map more spectacular but would also push the performance budget over the limit on the minimum-spec target. The right answer is almost always to ship what is already working and put the new feature on the post-launch list.
The performance budget is a number, and the number should be written down. Frame time on minimum-spec hardware, in milliseconds. Draw call count, in thousands. Triangle count, in millions. Memory budget for the level, in megabytes. Network update rate, in kilobytes per second. These numbers are the contract between the level team and the engine team, and the moment a feature would push the level over any of them, the feature is the wrong feature for this level.
The dam archetype is forgiving in some ways and unforgiving in others. It is forgiving because the setting provides a strong visual identity even with simple props and modest lighting. It is unforgiving because the water and the long sightlines will punish any team that has not budgeted for them. A dam battlegrounds map that respects its budget will ship on time and look good in screenshots. A dam battlegrounds map that ignores its budget will be the level players remember for the wrong reasons.
From prototype to ship: the final pass
The last week before the dam map ships is for polish, not for new features. The art team should be adjusting the final materials and the final lighting. The audio team should be tuning the cross-fades. The level design team should be moving cover and adjusting spawns based on the last playtest. The engineering team should be running the performance pass on minimum-spec hardware and fixing any regressions. The producer should be making sure no one is adding a new feature that was not in the design brief six weeks earlier.
The team should also write a short post-mortem, even if the map is on time. What worked, what did not, what would the team do differently next time. A dam battlegrounds map is expensive to build, and the lessons from one should reduce the cost of the next.
The dam archetype will keep showing up in multiplayer games because it works. The teams that ship good ones are the teams that respect the budget, decide on the flood mechanic early, and treat the map as a system rather than a backdrop. The teams that ship bad ones are the teams that try to do everything and end up with a level that looks like a concept art and plays like a beta.
Frequently asked questions
What is a dam battlegrounds map in multiplayer level design?
A dam battlegrounds map is a multiplayer arena built around a hydroelectric dam, with a reservoir, dam wall, control room, turbine hall, service tunnels, and a downstream canyon. The map can be static, where the dam is a setting only, or dynamic, where the dam interacts with the match through a flood mechanic.
Should my dam battlegrounds map be static or dynamic?
Choose static if your match length is short, your networking budget is tight, or your team is small. Choose dynamic if you have the time and the budget to validate a flood mechanic through multiple playtests, and if the match length supports a meaningful flood event. The decision should be made on the first day of pre-production because retrofitting a flood mechanic is one of the most expensive late changes a level can absorb.
What is the most common cause of shipping bugs in dam maps?
The most common cause is a flood mechanic that was added late to a static layout. Submerged collision, floating cover, and client-server desync on destructible spillway sections are the typical symptoms. The second most common cause is inconsistent lighting between the exterior and the interior, which the player will perceive as a visual bug even when the engine is rendering correctly.
How long should a dam battlegrounds match be?
Most competitive multiplayer matches live in the four-to-twelve-minute window, and a dam map fits comfortably inside that window if the flood mechanic is tied to objective progress. A two-minute match is too short to support a meaningful flood. A twenty-minute match is too long for the flood to feel urgent.
What performance budget should a dam map respect?
The map should respect the same frame time, draw call, triangle, memory, and network budgets as every other map in the game. The dam setting has three known costs: water rendering, large open sightlines, and the combination of interior and exterior lighting. Each has to be budgeted explicitly, and the moment a feature would push the map over any of the budgets, the feature should be cut or moved to a post-launch update.
How do you keep the dam’s identity with a small art team?
Invest in a tight library of high-detail props and reuse them across the wall, the control room, the turbine hall, and the service tunnels. The most important props are the spillway gates, the intake tower grates, the turbine housings, the control panels, the catwalk railings, and the floodlights. Materials and lighting will do most of the work after the props are in place.
What metrics should a dam map playtest capture?
Capture the metrics that answer the design questions the team wrote down before the playtest. Common useful metrics are spawn death time, time to first engagement, average engagement distance, route choice at each junction, and the player’s stated reason for choosing that route. Avoid capturing every metric the analytics system supports; three to five metrics captured consistently is more useful than thirty captured inconsistently.
When should a dam map’s time of day be locked?
Lock the time of day as early as possible, ideally during the blockout. Switching from noon to dusk in late production requires re-tuning every light, re-validating every material against the new exposure, and re-running the playtest cycle. The cost is high and the benefit is usually small.
Can a small studio ship a competitive dam battlegrounds map?
Yes, but the studio should treat the dam as one entry in a small rotation, not as the flagship. A dam map’s production cost is higher than a typical arena because of the water, the long sightlines, and the interior-exterior lighting combination. A small studio should pair the dam with a simpler level to balance the rotation’s cost and to give players a contrast.
