
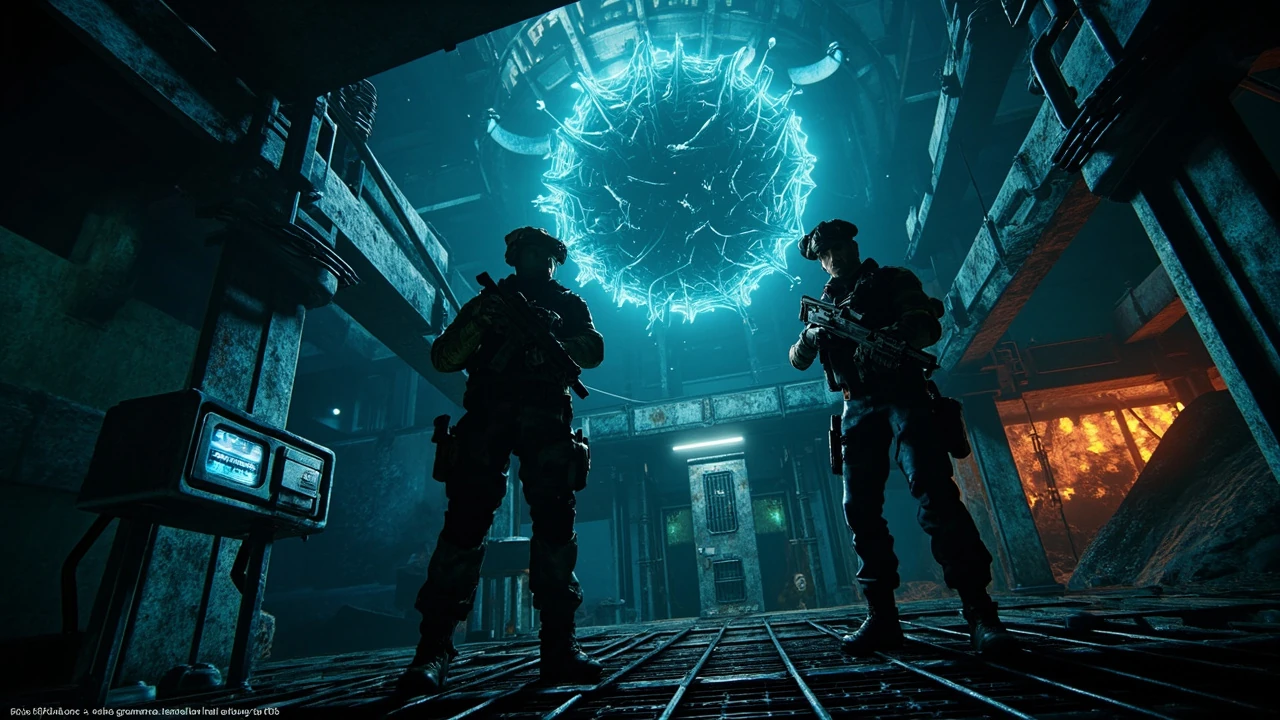
Firebase Z easter egg in Cold War Zombies: what the run actually involves
The Firebase Z easter egg is the main quest for the second round-based map in Call of Duty: Black Ops Cold War Zombies. The mission threads through Firebase Z, a series of conversations with Ravenov and Dr. Peck, a truth serum built from three locker parts, three captured Mimic memories, three dug-up Aether crystals, and a final fight against a boss called Orda inside the Omega Portal Chamber. Finishing the quest is supposed to pay off the Dark Aether story and any map-specific rewards tied to completion.
Compared with Die Maschine, the first map’s main quest, the Firebase Z easter egg puts more weight on the puzzle middle and the scripted finale. The individual steps are not hard on paper: interact with a named object, bring an item back to a specific machine, defend an area for a fixed window. The skill floor is mostly in reading the map’s districts, perks, and Pack-a-Punch layout well enough to keep the round counter from eating your armor and revives.
This walkthrough sticks to what the verified GamesRadar Firebase Z easter egg guide actually describes. Where the guide does not list a detail, the step is left partially open rather than filled in from memory. That keeps the run honest for anyone following along in a real match.
Quick reference table for the Firebase Z easter egg
| Step | Where it happens | Key item or trigger | What you actually do |
|---|---|---|---|
| Power and intro dialogue | Village, then Firebase Z, then Mission Control | Aether Reactors, Ravenov, Dr. Peck, ID Badge | Activate all three reactors, complete both conversations, pick up the ID Badge |
| Serum parts | Village Equipment Storage, Colonel’s Office, Engineering | Three locker parts, vacuum table in the Field Hospital | Open each locker, combine parts at the Field Hospital, clear the Hellhound wave |
| Vent the serum and visit the Data Center | Top of Mission Control, Data Center second floor | AC unit, Memory Transference Station, Essence Trap | Place the serum on the AC unit, talk to Dr. Peck, then interact with the station |
| Mimic memories | Data Center and around the map | Essence Trap, three valid Mimics from item clusters | Trap the right Mimics at low health, return the trap three times, collect the floppy disk |
| Quantum Main Frame and OPC | Planning Offices upper floor, then the spherical chamber | Floppy disk, Quantum Main Frame, anomaly | Insert the disk, enter the OPC, watch the anomaly, return to Dr. Peck |
| Aether crystals | Jungle Defense, Planning Offices, Scorched Defense | Aethermeter, shovel, three crystal containers | Grab the Aethermeter and shovel, clear each dig-site defense, collect the containers |
| Orda boss | OPC | Crystal containers, full loadout | Start the boss, manage adds, burn down Orda with the Wonder Weapon on damage windows |
The table is a map of the quest, not a substitute for the steps below. The middle of the run has a few moments where the order is forced by triggers, and getting the order wrong usually means restarting a phase rather than skipping ahead.
Prerequisites: power, Pack-a-Punch, and starting the RAI K-84 hunt
Every Firebase Z easter egg run begins the same way as a normal match. Stack points in the early rounds, unlock the upstairs portion of the village, take the teleporter into Firebase Z proper, and activate each of the three Aether Reactors. The guide treats power as a hard prerequisite, not an optional side task: each reactor interaction has a points cost, and the easter egg assumes the power is on before any of its dialogue triggers will fire.
With power online, the map opens Pack-a-Punch, the fixed perk machines, and the Mystery Box. The easter egg leans on those systems rather than replacing them, so a run that tries to skip the standard setup is almost always slower. A run that ignores the Wonder Weapon is also slower: the RAI K-84 becomes a hard requirement for a later step, and the longer you delay, the more rounds you spend waiting on a Mystery Box pull.
You do not need the RAI K-84 to start the quest, but the guide is clear that you should treat it as a parallel objective from the moment Pack-a-Punch is available. The three ways to get the weapon are the Mystery Box, the map’s trials, or the construction route. The Mystery Box is the easiest path for most players, while construction removes the RNG ceiling at the cost of more setup.
Step 1: power, Ravenov, Dr. Peck, and the ID Badge
After all three Aether Reactors are online, the first Firebase Z easter egg beat is dialogue-driven. Teleport back to the village and speak with Ravenov, then return to Firebase Z and speak with Dr. Peck through the glass window on the bottom floor of Mission Control. When that conversation ends, the quest instructs you to go back to the village one more time and talk with Ravenov again. He hands you the ID Badge, which is the key item for the next phase.
Each of those conversations is its own trigger, and the game does not advance the quest until the dialogue fully resolves. If you run away mid-cutscene or step out of the trigger area, the next step may not unlock even after a full round. Stand near each character until the line finishes, then move.
The ID Badge also marks the move from the introductory story beat into the first real collectible phase. Once you pick it up, the next stage is opening three lockers around the map to assemble a truth serum, and the quest has officially shifted from setup to puzzle.
Step 2: the three lockers and the truth serum
With the ID Badge in hand, the Firebase Z easter egg asks you to open three lockers around the map. Each locker contains one part needed to build the truth serum. The guide lists the lockers in the order the player will most naturally visit them, but the quest does not enforce that order.
| Locker | Location | What to look for |
|---|---|---|
| Equipment Storage | Starting village, bottom floor, building to the right of the perk machine | Directly across from the Pack-a-Punch building |
| Colonel’s Office | Firebase Z, second floor of the Control Room, east side of the map | Locker sits on the left side of the office |
| Engineering | West side of the map, bottom floor of Engineering | The furthest locker from the village |
Each locker is a simple interaction, but the travel between them is real. The Colonel’s Office is easiest reached through Mission Control, while the Engineering locker is a longer run on the opposite side of the map. Plan a path that does not zigzag across Firebase Z while a high round is chewing through your armor and perks.
After you have all three parts, go to the Barracks area and find the Field Hospital. A vacuum sits on a table. Interact with it and a wave of Hellhounds spawns. Clear them, interact with the table again, and pick up the now fully mixed serum. The Hellhound fight is the first real survival check of the quest, and it doubles as a useful stress test of your loadout before the longer defense phases ahead.
Step 3: venting the serum and opening the Data Center
The mixed serum needs to reach Dr. Peck. Take the serum to the top of the Mission Control building, just beneath the large spherical structure known as the OPC, and place it on the AC unit. That action routes the serum through the vents so Dr. Peck can be questioned. From the player’s perspective, this step is a short traversal followed by another dialogue trigger.
After Dr. Peck’s new dialogue, the quest routes you to the Data Center, the building with the satellite on top. This is the transition from the introductory quest into the Mimic memory section. The guide marks this as the right moment to push hard for the RAI K-84 if you do not already have it, because the next phase assumes you can defend yourself for an extended period.
Step 4: the RAI K-84 and why the Wonder Weapon matters here
The Firebase Z easter egg does not require the RAI K-84 to start the Mimic memory phase, but the Wonder Weapon makes the phase dramatically more reliable. The three ways to get the weapon are the Mystery Box, completing trials, or constructing it on the map. The Mystery Box is the path most players already know, while the construction route rewards the players who have already invested the time in the buildable parts.
Mechanically, the RAI K-84’s value here is crowd control. The Mimic memory step has long lulls between objectives punctuated by sudden spawns, and the Wonder Weapon turns those spawns into a manageable cost rather than a run-ender. For solo players, the construction route is worth the extra setup time because it removes the RNG ceiling from the rest of the quest.
The guide does not list a round threshold for when to start hunting the RAI K-84, but its framing is clear: the longer you wait, the more expensive each round becomes. A practical target is to commit to the RAI K-84 between rounds 10 and 15, when perks and Pack-a-Punch are stable and you still have points to absorb a few bad Mystery Box pulls.
Step 5: capturing Mimic memories in the Data Center
Once the RAI K-84 is in hand, the next Firebase Z easter egg objective is on the second floor of the Data Center. The Memory Transference Station sits near the Speed Cola perk machine. Interact with it, and the device offers an Essence Trap for you to pick up. That trap is the core tool for the rest of the phase.
The guide is unusually detailed about how the Essence Trap works, because the Mimic memory step is the most common place where runs fall apart. The rules are:
- Only Mimics that appear as traps from items scattered around the map count. Mimics that spawn alongside regular zombies do not count.
- Only Mimics that spawn from a cluster of items count. A single item on the ground produces the wrong type of Mimic.
- The trap must be detonated while the target Mimic is at low health, roughly 10 to 20 percent, for it to be sucked in.
- Each successful capture returns one third of the same code at the Memory Transference Station, so there is nothing to memorize.
The guide also admits that this is the most annoying step of the quest. The trap Mimics are tied to RNG item spawns around the map, and the source reports a better success rate in the upper floors of the village and on the west side of Firebase Z, while still flagging that the spawns can appear anywhere. The safest play pattern is to end each round by sweeping high-traffic areas, looking for groups of items on the floor, and engaging the resulting Mimic until it is low enough to trap.
You need three successful captures. If the station rejects a trap, the wrong Mimic was captured and the process continues. Plan the phase around resetting in safe areas, since a failed capture in the open often leaves you exposed to a normal round on top of the Mimic you just lost.
Step 6: the Quantum Main Frame and the OPC
After the third successful Mimic memory is deposited, the Memory Transference Station spits out a floppy disk. Pick it up and take it to the Quantum Main Frame on the upper floor of the Planning Offices, along the wall closest to the large spherical structure. Interact with the frame to insert the disk.
The guide describes what happens next as the OPC opening up. Walk up the steps leading to the chamber and an anomaly appears, which is the game’s way of saying the next scripted beat has triggered. Once the anomaly is visible, head back down to Dr. Peck for another short conversation, and the quest will hand you the next objective: gather Aether crystal containers.
This step is short in isolation, but it sits at a real difficulty peak. The map is usually on a high round by the time you reach the OPC, and the steps around the spherical structure are exposed. Resupply shields and perks before you approach the chamber so the anomaly does not catch you at half health.
Step 7: the Aethermeter, the shovel, and three Aether crystals
Before hunting crystals, the guide describes two setup actions. First, interact with the locker to the left of Dr. Peck’s window. An Aethermeter spawns on the floor in front of it. Treat this as a metal detector for Aether crystals. Second, the quest requires a shovel, which can be found in the Scorched Defense area just outside Dr. Peck’s location. The shovel spawns in one of the small huts in that area, so visit each hut until it appears. The guide is explicit: you cannot dig up the crystals without the shovel, and the dig sites are hard to locate in a reasonable time without the Aethermeter beeping you in.
Once both items are in hand, the Firebase Z easter egg asks you to dig up three Aether crystals, each in a fixed location and each with a different challenge. They can be collected in any order. The guide describes each site as a small arena defense with a different mix of enemies, which means your loadout and perk choices matter more than your exact pathing between them.
Jungle Defense crystal
Head to the Jungle Defense area and walk to the very end of the trench section, toward the middle protrusion. The guide describes a mound of dirt at the end, with the Aethermeter beeping loudly as you approach. Interact with it to start a long defense phase that mixes zombies, Mimics, Manglers, and Hellhounds. The guide recommends going in with full shields, perks, a Self-Revive, and the RAI K-84. When the phase ends, pick up the Aether crystal container.
Planning Offices crystal
The Open Lot section of the Planning Offices is the second crystal site. The guide describes a window that leads back to the area where the locker from the earlier serum step sits. From there, you interact with a dig spot and run a similar defense phase. The verified excerpt cuts off before it lists the exact enemy mix at this site, so the practical advice is to assume it is on par with the Jungle Defense fight and to bring the same loadout.
Scorched Defense crystal
The third crystal is in the Scorched Defense area where the shovel originated. The dig spot is close to the huts and easy to overlook because the area is small. The defense phase is described in the same terms as the other two, with the same caveat that the source does not enumerate the enemy mix in the available excerpt.
Step 8: the Orda boss fight in the OPC
Once all three Aether crystal containers are collected, the Firebase Z easter egg routes you into the OPC for the Orda boss fight. The guide describes Orda as the final boss of the quest and frames the entire easter egg as a mission to save Samantha Maxis. Mechanically, the fight is the most expensive single action in the run, and it expects you to arrive with full perks, upgraded weapons, a Self-Revive, and as much armor as you can carry.
The guide does not enumerate Orda’s attack patterns in the verified excerpt, so the practical advice is conservative. Keep moving, prioritize adds when they spawn, save the Wonder Weapon for the damage windows the quest clearly hands you, and treat the round counter as a resource rather than a number to push. Most failed runs at this stage come from players arriving undergeared rather than from misreading the boss.
How a developer can read the Firebase Z quest as a game design pattern
For a reader who builds or studies game systems, the Firebase Z easter egg is a useful case study in layered quest design. The early steps are linear dialogue gates, the middle steps are collectible loops with their own micro-rules, and the finale collapses everything into a single high-stakes encounter. Each layer reuses systems that already exist in normal play: perk machines, the Mystery Box, Pack-a-Punch, and round-based spawning.
The Mimic memory step in particular is worth studying. It is built around a counter-intuitive rule that only Mimics spawned from clusters of items count, which is the kind of rule that has to be discovered rather than read off a UI. The game communicates this poorly by design: the rule is the puzzle, and the frustration of running into the wrong Mimic is part of the intended experience. Designers building similar layered quests can borrow the pattern of using a single mechanical rule to gate a long collectible phase.
For narrative designers, the Firebase Z easter egg shows how a story can be advanced through ambient dialogue and object interactions rather than cinematics. Every step has a dialogue beat attached, and the beats are short enough to keep the round-based loop intact. Players who skip the dialogue still see the quest advance, but they miss the connective tissue that ties Ravenov, Dr. Peck, and the OPC into a coherent story.
Common failure modes and how to avoid them
Most Firebase Z easter egg failures fall into a small number of patterns. Recognizing them early is the difference between finishing in round 20 and bleeding resources until the map overtakes you.
- Trying to rush the Mimic memory step without the RAI K-84. The phase is long, and crowd control without the Wonder Weapon is brutal at high rounds.
- Capturing the wrong Mimic because the player does not know that only Mimics from item clusters count. The failure is silent: the Memory Transference Station simply rejects the trap.
- Forgetting the shovel in the Scorched Defense huts. Without the shovel, the Aether crystals cannot be dug up, and the quest stalls without an obvious error message.
- Skipping the Aethermeter pickup from the locker next to Dr. Peck. Without the Aethermeter, the crystal dig sites are extremely hard to locate in a reasonable time.
- Entering the Orda fight on a low round budget. The boss expects full resources, and showing up half-revived is a guaranteed reset.
None of these failure modes are bugs. They are the quest’s way of demanding preparation, which is why the guide spends so much time on prerequisites. Treat the first third of a run as setup, the middle as puzzle, and the finale as execution, and the Firebase Z easter egg stops feeling like a grind.
Practical loadout recommendations for the quest
Because the verified guide is built around a single map and a known enemy set, the loadout advice is mostly about role coverage rather than raw damage. The Firebase Z easter egg assumes you can deal with regular zombies, Mimics, Hellhounds, and Manglers at high rounds, with periodic bursts of pressure during the defense phases. A sensible loadout is one strong single-target weapon, one weapon with decent area damage, the RAI K-84 when you can get it, and at least one Self-Revive.
Perk choices should reflect the quest’s geography. Speed Cola is useful for the Essence Trap step, where quick reloads make a real difference. The stamina perk is helpful during the long traversal between the Engineering locker and the Colonel’s Office. The armor-buying perk is essential if you plan to push for the Orda fight without buying armor every round.
For solo players, the biggest practical difference is that you cannot share revive resources. Bring two Self-Revives if your loadout allows, and treat the Field Hospital vacuum fight as a checkpoint for if you are actually ready for the rest of the quest. If that fight feels expensive, the Aether crystal phases will feel worse.
Solo versus squad: what actually changes
The verified guide notes that the Firebase Z easter egg can be completed solo, and that a squad is always preferable. The practical differences are not in the quest’s structure but in the resource budget. Solo players spend more on armor and Self-Revives, take longer on each traversal, and have a smaller margin for error during defense phases. Squads can split up to cover Mimic memory spawns, share the cost of the RAI K-84, and trade revives during the Orda fight.
The quest does not require four players to complete, but several steps are noticeably easier with two or more. The Essence Trap step, in particular, is faster with one player herding Mimics while another watches for the item clusters that spawn them. The Orda fight is a much safer proposition with at least one teammate dedicated to clearing adds.
What the Firebase Z easter egg guide does not cover
It is worth being honest about what the verified source does not list. The excerpt is long, but it cuts off in the middle of describing the Planning Offices crystal step, and it does not spell out every Aether crystal defense in full detail. The source also does not enumerate Orda’s attack patterns, the exact round thresholds for any step, or the full unlock list for completing the easter egg on Firebase Z specifically. Any detail not in the source should be treated as unknown, and a responsible reader should not assume those gaps can be filled from memory or from similar Zombies maps.
For developers and technical readers, this gap is itself instructive. The Firebase Z easter egg is large enough that even a detailed walkthrough can leave steps under-specified, which is one reason community guides tend to be supplemented by video. If you are building a quest of similar depth, plan for the fact that players will need a primary source plus a secondary visual reference, and design the failure states to be recoverable rather than fatal.
Frequently asked questions
How long does the Firebase Z easter egg take to complete?
The verified guide does not give a specific time, but it does say the quest can be seen through by around round 20 with preparation, and that solo runs are viable. A practical estimate for an experienced squad is around an hour, with solo runs taking longer because of the resource cost.
Can the Firebase Z easter egg be completed solo?
Yes. The verified guide states the quest can be completed solo, while also noting that a squad is always preferable. Solo players should plan for higher Self-Revive use, slower traversal, and tighter resource management.
Do I need the RAI K-84 to finish the Firebase Z easter egg?
The RAI K-84 is not described as a hard requirement for the early steps, but the verified guide is explicit that the weapon becomes a hard requirement for a later step, and that you should start hunting it as soon as power is on. Treat the RAI K-84 as a parallel objective from the moment Pack-a-Punch is online.
Where do I find the Aethermeter and the shovel?
The Aethermeter is in the locker to the left of Dr. Peck’s window and spawns on the floor when interacted with. The shovel is in the Scorched Defense area just outside Dr. Peck’s location, in one of the small huts. Visit each hut until the shovel appears.
Why does the Memory Transference Station keep rejecting my Mimic?
The verified guide states that only Mimics spawned from clusters of items count, and that single items will not produce a valid Mimic. The trap also has to be detonated while the Mimic is at low health. If the station rejects your trap, you likely captured the wrong type of Mimic, or you triggered the trap too early.
What is the order of the Aether crystal defense phases?
The guide describes three Aether crystals in fixed locations: Jungle Defense, Planning Offices, and Scorched Defense. They can be collected in any order, but each one is a defense phase with a different enemy mix, and the Jungle Defense phase in particular is described as a long fight with zombies, Mimics, Manglers, and Hellhounds.
What should I bring into the Orda boss fight?
The guide recommends full shields, perks, at least one Self-Revive, and the RAI K-84 going into the toughest defense phases, and the same logic applies to the Orda fight. Show up undergeared and the boss will reset you.
Is the Firebase Z easter egg harder than Die Maschine?
The guide describes Firebase Z as feeling easier than Die Maschine in some respects, but with a heavier puzzle middle and a more scripted finale. The Mimic memory step is consistently called the most annoying part of the run, which is the real difficulty spike compared with the first map’s quest.
What unlocks do I get for finishing the Firebase Z easter egg?
The guide mentions story content and the Dark Aether cutscene, but the verified excerpt does not list every reward tied to Firebase Z completion. Treat reward lists outside the source as unverified and check official channels for the current unlock state.
Where can I read a detailed Firebase Z easter egg walkthrough?
For a step-by-step reference, the verified Firebase Z Easter egg guide on GamesRadar covers the prerequisites, the locker locations, the Mimic memory rules, the Aether crystal sites, and the boss fight in the order they actually happen.
