
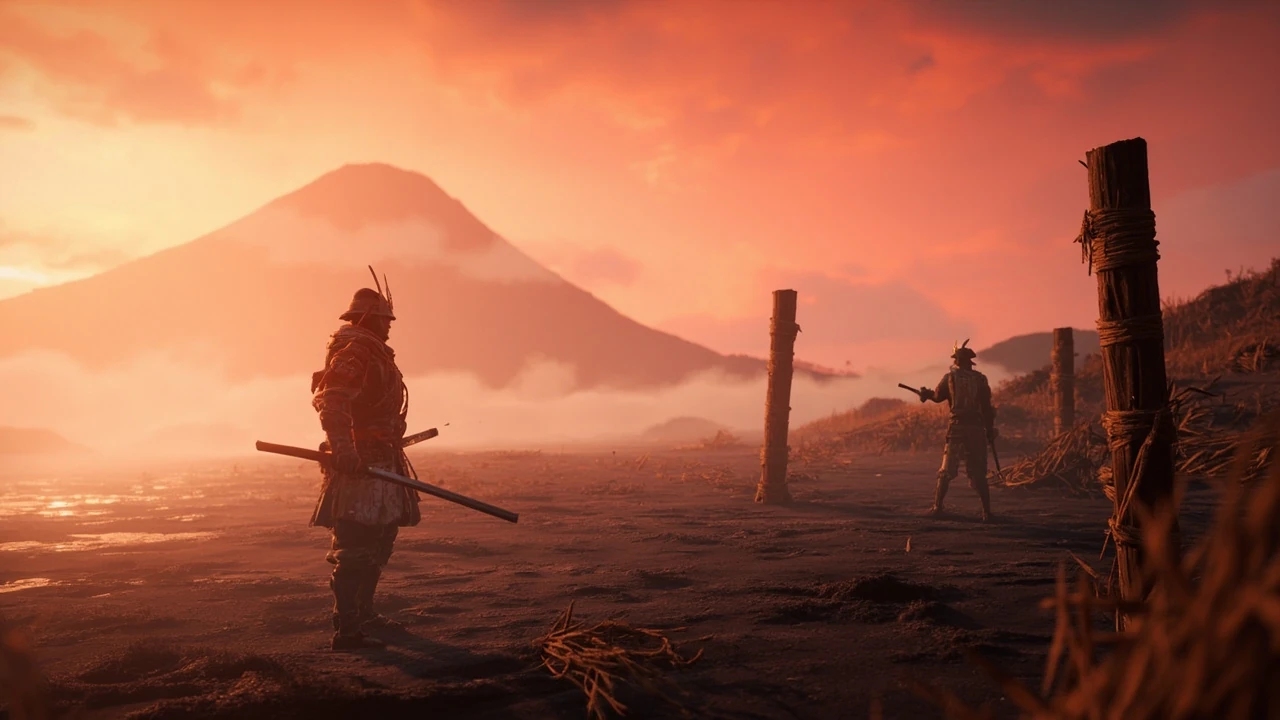
Takezo the Unrivaled: starting the Ghost of Yotei Myth quest
Takezo the Unrivaled is one of the optional Myth quests in Ghost of Yotei, the open-world samurai action game set across the Ezo region. The quest threads through five hidden duels, each led by a Disciple of Takezo, before the swordsman himself appears. Beating all six fights unlocks the Dual Katana Spirit Attack, a combat style that fits into Atsu’s late-game weapon rotation and rewards a defensive, parry-focused playstyle.
This guide walks through how to start the quest, where to find every Dueling Tree, how each Disciple’s moveset works, and what to do once Takezo finally steps onto the sand. The structure follows the verified quest flow rather than a generic “best build” page, so the order below matches the order players actually progress through the Myth.
How to unlock Takezo the Unrivaled
The Myth does not appear on the map at the start of the game. It is gated behind a story beat, a single storyteller, and the world state that opens up after the player has explored the southern coast of the Yotei Grasslands.
- Reach the Yotei Grasslands, the starting region, and explore the southern coastline until you find a small camp next to the Coastal Dueling Tree.
- Locate Ugetsu, the storyteller, who is sitting by a fire near the dueling post. He recounts the legend of a swordsman who could not be beaten.
- Listen to the full tale. When Ugetsu finishes, the five Dueling Tree locations tied to Takezo the Unrivaled are added to the world map and the quest log.
- Progress through the main story far enough that the Yotei Grasslands, Tokachi Range, and surrounding areas are accessible. Some duels require new regions to be open before the ronin will actually appear at the tree.
A useful early confirmation is that the first Dueling Tree sits right next to Ugetsu’s camp, but the ronin will not be waiting there until the player has triggered the right story event. Returning later is part of the intended pacing, not a bug.
Combat foundations you need before any duel
Every Dueling Tree fight is built around a small set of systems. Players who skip the basics tend to bounce off the second Disciple, so it is worth solidifying the core loop before chasing Takezo himself.
- Perfect parry: a timed block on a yellow-glint attack that staggers the enemy and opens them up to a heavy counter.
- Dodge: the only reliable answer to red-glint unblockable attacks, which can be a single strike, a combo, or a charged thrust.
- Spirit and equipment: not restocked between phases of the Takezo fight, so players should enter the final duel with a full Spirit bar and preferred tools equipped.
- Weapon swap: each Disciple changes weapon halfway through the duel. Matching the counter-weapon, especially Dual Katanas or the Yari from Ishikari Plain, is the difference between a clean win and a sloggier one.
One rule of thumb carries through every duel in the Myth: when the windup animation looks too clean, expect a fakeout. Several Disciples sell a strike that never lands, then punish the early parry. Wait for the glint, not the body movement.
The five Dueling Tree locations, in quest order
The map pins the trees once Ugetsu has told the story, but the in-game order below is the order the Disciples appear and reward charms. The regions and landmarks match the geography of Ezo used by the quest.
| Order | Region | Landmark | Starting weapon | Reward charm |
|---|---|---|---|---|
| 1 | Yotei Grasslands (south) | Bank of Shikotsu River | Katana | Charm of the Unrelenting Warrior |
| 2 | Yotei Grasslands (northwest) | Yotei River fork, end of the river | Katana | Charm of Renewed Determination |
| 3 | Tokachi Range (northwest) | Northwest corner past Ohara Plains and Yubari Lake | Katana | Charm of Bold Deflection |
| 4 | Tokachi Range (east) | Tomamu Marshlands | Katana | Charm of Bracing Victory |
| 5 | Tokachi Range (northeast) | Niikappu Falls, past the Green Dye House and Ainu Camp | Spear | Charm of the Stout Heart |
Approach each tree from the south or downwind when possible. The Disciples are scripted to wait at the top of a small rise, and the first strike is usually telegraphed by a slow draw as the player climbs.
Disciple 1: the Shikotsu River bank
The first Dueling Tree is the most accessible because it is the same tree the player saw during the Ugetsu cutscene. The Disciple here leans on dirty tactics against weak samurai and travelers, so his toolkit mixes honest strikes with two unblockable mixups.
- Parryable overhead combo: a hand-up blade raise into an overhead strike and a follow-up stab. The opening flourish is the tell.
- Unblockable shoulder charge: telegraphed by a red glint when he backs off. Dodge to the side rather than forward to clear the follow-up slash.
- Yellow disarming strike: he calls out, sheaths the sword, and draws again. Counter with the player’s own draw attack by holding and releasing the Triangle button.
When his health drops, he switches to dual blades. The overhead windup stays the same, which is the cue to swap to Dual Katanas and keep the rhythm. The reward is the Charm of the Unrelenting Warrior, which boosts damage when health is low, so this charm has natural synergy with the very quest that grants it.
Disciple 2: the Yotei River fork
Ride north along the Sarubetsu River until it forks into the Yotei River, then head west. The Dueling Tree sits at the end of the Yotei River in the northwestern Yotei Grasslands. This Disciple adds two new layers: a fakeout opening and a low-health weapon swap to spear.
- Parryable fakeout: he drops low as if he is about to strike, then quicksteps to throw off timing. Wait until the actual blade swing before parrying.
- Triple thrust combo: a standard kataman-style string that can chew through a full health bar if all three hits land clean. Parry each one or dodge in a consistent direction.
- Spear phase: he pulls a spear at low health. Switch to Dual Katanas, since all spear swings must be parried or dodged. Sidestep thrusts because they are faster than the wide swings.
Winning grants the Charm of Renewed Determination, which generates Spirit whenever the player takes damage. The design intent is clear: a tankier player gets more Spirit, which fuels the heavy attacks and tools used in the next duels.
Disciple 3: the northwestern Tokachi Range
From the Yotei Grasslands, ride northwest across the Ohara Plains past Yubari Lake. The third Dueling Tree sits in the far corner of Tokachi Range, and the Disciple here is a difficulty spike. He blends unblockable and parryable strikes into the same combo, which is unusual earlier in the game.
- Mixed combo: an unblockable overhead, an unblockable behind-the-back spin, then a parryable slash at the end. The pattern is to dodge twice and parry once.
- Spin closer: a parryable spin that closes distance. If the timing is uncertain, sidestep rather than commit to a parry.
- Kama phase: he swaps to twin kama. If the player has been to Ishikari Plain and unlocked the Yari style, this is the matchup where it pays off. Otherwise, the standard katana handles the job, and most kama combos can be held on block.
The reward is the Charm of Bold Deflection, which increases stagger damage from parries. Pairing it with a parry-focused build makes the rest of the quest smoother, especially the dual-glint attacks that the final two Disciples throw out.
Disciple 4: Tomamu Marshlands
The fourth Dueling Tree stands in the eastern part of Tokachi Range, inside Tomamu Marshlands. This Disciple is a parry-friendly opponent once the player has seen the patterns, but his unblockable mixups punish a reckless opener.
- Three-slice red combo: the highest burst damage in the quest. Sidestep on the first red glint and reset stance.
- Long-windup draw: he crouches and draws the sword from a hip sheath. The animation is long, the parry window is forgiving, and the reward is a stagger.
- Dual kama phase: a final weapon swap with no new moveset. Use Metsubushi or other tools to stun him and burn the last sliver of health.
Defeating him grants the Charm of Bracing Victory, which restores health whenever the player defeats a staggered enemy. With the previous three charms, the player’s health economy during duels becomes noticeably more forgiving.
Disciple 5: Niikappu Falls
Niikappu Falls sits in the northeastern corner of Tokachi Range, just past the Green Dye House and the Ainu Camp along the Niikappu River. This Dueling Tree is the only one where the Disciple opens with a non-katana weapon, and his later phase is one of the hardest individual fights in the quest.
- Spear opener: standard spear moveset. Parry timings are slower than katana, so dodging is the safer default until the player gets a feel for the windows.
- Katana phase: a mix of unblockable combos that finish with parryable glint attacks. The safe read is to dodge the unblockable strings and parry only the glint finisher.
- Spear return: if he swaps back, bring out the Dual Katanas. The back-and-forth is part of the design and rewards players who track the weapon icon above his head.
The reward is the Charm of the Stout Heart, which increases healing potency. Upgraded, it is a strong survivability charm for the rest of the game, not just this quest.
Charm loadout and what to upgrade
By the time the player has cleared all five Dueling Trees, the charm slots are full of overlapping effects. The table below groups the rewards by role so it is easier to decide which charm to keep active during the Takezo fight.
| Charm | Trigger | Effect | Best moment to equip |
|---|---|---|---|
| Charm of the Unrelenting Warrior | Low health | Increased damage | Closing the second phase of the Takezo duel |
| Charm of Renewed Determination | Taking damage | Generates Spirit | Long boss fights, including the spear phase of Disciple 2 |
| Charm of Bold Deflection | Successful parry | Extra stagger damage | Any duel heavy on yellow-glint attacks |
| Charm of Bracing Victory | Defeating a staggered enemy | Health restore | Chained duels and exploration |
| Charm of the Stout Heart | Healing | Increased healing potency | Standard open-world exploration |
There is no single “correct” charm set for the final duel, but combining Bold Deflection with Renewed Determination tends to smooth out the longer second phase, where Spirit management and stagger windows matter more than raw burst.
Reaching Takezo and entering the final duel
Once the fifth Disciple falls, a stranger approaches and tells the player to meet him at the Coastal Dueling Tree where the quest began. Fast travel to the southern edge of the Yotei Grasslands, return to Ugetsu’s campsite, and wait. The man who arrives is Takezo himself, and he leads the player down to the beach for the last fight.
Before accepting the prompt to begin, confirm three things:
- Spirit bar and key tools are restocked, since the second phase begins from a checkpoint with no refill.
- Preferred charms are equipped, because the second phase has a longer health bar than any Disciple fight.
- Weapon loadout is set, because there is no equipment wheel inside the duel itself.
Takezo phase 1: the katana duel
Phase 1 is a straightforward duel, but Takezo uses a layered moveset that punishes muscle memory. The cues below are the patterns verified by the quest’s source material and should be trained on a few open-world samurai encounters first.
- Unblockable shoulder slice: a small flourish, then a horizontal shoulder cut. The glint sits on the shoulder, not the blade. Dodge to the side and punish.
- Triple over-the-shoulder stab: three consecutive stabs that must be parried. If the timing is uncertain, dodging all three is the safe read, since the full string can kill in one combo.
- Fakeout slice: a low crouch, two small steps forward, then a strike. The parry glint stays on the sword the whole time, so waiting for him to close distance is the correct response.
- Unblockable draw attack: a hip draw that telegraphs with a lowered sword. Dodge, do not parry.
- Kick mid-combo: a kick that interrupts the player’s parry rhythm. Stay mobile rather than locked into a single beat.
Phase 1 ends with a checkpoint, but Spirit and consumables are not refreshed. The transition is also a natural moment to switch charms or swap the active weapon if the current loadout is not landing cleanly.
Takezo phase 2: the oar
Phase 2 begins with Takezo picking up an oar from the beach. Mechanically the oar behaves like a naginata, which means the moveset should be familiar from earlier samurai encounters. Counter it with Dual Katanas to keep stagger damage high and to maintain the same parry cadence used on the Disciples.
- Wide oar swings: slow, telegraphed, easy to parry. These are the primary stagger windows.
- Thrust strings: faster than the swings. Dodge rather than parry if the timing is tight.
- Stance break recoveries: he recovers slowly from whiffed heavies, which is when Metsubushi or a fully charged Spirit attack deals the most damage.
The reward for surviving phase 2 is the Dual Katana Spirit Attack, which becomes a permanent addition to the player’s combat kit. It is worth practicing the input once the fight is over, because the animation chain opens with a stance that is easy to misread during a real encounter.
How Takezo the Unrivaled connects to the wider Ghost of Yotei combat design
For a GameDev audience, the quest is a useful case study in how Ghost of Yotei layers complexity inside a single optional thread. Three design choices stand out.
- Staggered difficulty: each Disciple introduces one new mechanic at a time, then reuses it in a harder context. Players who learn the language of glints and fakeouts in duel 1 are ready for the multi-glint mixups in duel 5.
- Reward-driven loadout shaping: the charms are not stat sticks. They shift the player’s preferred playstyle, so the quest actively teaches the Dual Katana and Yari stances it then asks the player to use in the final duel.
- Two-phase boss with a hard resource boundary: phase 1 is a rhythm check, phase 2 is a resource check. The checkpoint between them exists, but the lack of restock forces a real loadout decision, which is more interesting than a simple “boss has more health” pattern.
For developers, the cleaner reference is the official Takezo the Unrivaled Walkthrough on IGN, which captures the verified move list and reward set that this guide is built on.
For historical context on the type of wandering swordsman archetype Takezo belongs to, the Miyamoto Musashi entry on Wikipedia is a useful reference for designers thinking about how real dueling culture shaped the in-fiction legend of an “unrivaled” swordsman.
Common failure modes and how to avoid them
Most quest restarts during Takezo the Unrivaled come from a small set of repeated mistakes. The list below is a quick diagnostic, in the same spirit as a post-mortem checklist.
- Parrying the fakeout: the glint sits on the weapon, not the body. Wait for the swing, not the crouch.
- Holding block on a red glint: red-glint attacks are unblockable. The block animation locks the player into a stagger that the next swing capitalizes on.
- Forgetting the weapon swap: when the Disciple pulls a spear, kama, or dual blades, the player needs to match counter-weapon. Standing in katana stance against a spear phase is the slowest way to lose a duel.
- Entering phase 2 empty: Spirit and tools are not restocked. A short detour to refill at the checkpoint prevents a softlock on the second phase.
Each of these is a design signal: the quest is built around a small number of legible rules, and breaking those rules is more punishing than a stat deficit.
Frequently asked questions
Where do I start Takezo the Unrivaled in Ghost of Yotei?
You start the Myth by finding Ugetsu, the storyteller, at a small camp next to the Coastal Dueling Tree on the southern coast of the Yotei Grasslands. Listening to his full tale unlocks all five Dueling Tree locations tied to the quest.
How many Dueling Trees are in the Takezo the Unrivaled quest?
There are five Dueling Trees, each guarded by a Disciple of Takezo. Beating all five is the requirement for Takezo himself to appear.
Do I need to finish the main story before fighting Takezo?
You need enough main story progress that the relevant regions are open and the ronin actually spawn at the Dueling Trees. The first tree sits right next to Ugetsu’s camp, but the ronin there only appears after a specific story beat, not immediately after the cutscene.
What reward do I get for beating Takezo the Unrivaled?
Completing the quest unlocks the Dual Katana Spirit Attack, a new combat style for Atsu. Along the way, each Disciple also drops a themed charm that shapes a defensive or parry-focused playstyle.
Which charm is the best from the Takezo quest?
There is no single best charm. Charm of Bold Deflection is the strongest pick for parry-focused players, Charm of the Stout Heart is the safest pick for general exploration, and Charm of Renewed Determination is the best pick for long fights where Spirit is the limiting resource.
What is the easiest way to beat the spear-wielding Disciple at Niikappu Falls?
Stay on the Dual Katanas, dodge the unblockable strings, and parry only the glint attacks that end each combo. When he swaps to katana, parry the basic slashes. The pattern of dodge-then-parry is the safest read for that fight.
Does the second phase of the Takezo fight restock Spirit?
No. The checkpoint between phase 1 and phase 2 does not refill Spirit or consumables. Restock before starting the duel and only equip charms that fit a long second phase.
Can I redo a Dueling Tree after beating it?
The Dueling Tree fights are quest encounters rather than repeatable duels. Once the Disciple is defeated, the tree remains as a landmark, but the encounter does not respawn for a second reward.
Is the Dual Katana Spirit Attack worth getting for the late game?
It is one of the strongest style unlocks tied to an optional Myth, and it fits the defensive, parry-focused playstyle that the quest actively trains. For players who already favor the Dual Katanas, the Spirit Attack is a clear upgrade.
Does Takezo the Unrivaled count toward 100 percent completion?
Beating all five Disciples and the final duel counts toward the game’s Myth quest completion, which feeds into the broader completion trackers for Ghost of Yotei. It is one of the longer optional questlines in the Yotei Grasslands and Tokachi Range.
